Add Items by Cover
Use covers when you want table items to be assigned to individual guests. This keeps the order grouped by cover and helps later when splitting the bill.
Open the table
- Open the table from the table area.
- Check the correct number of covers has been set for the table.
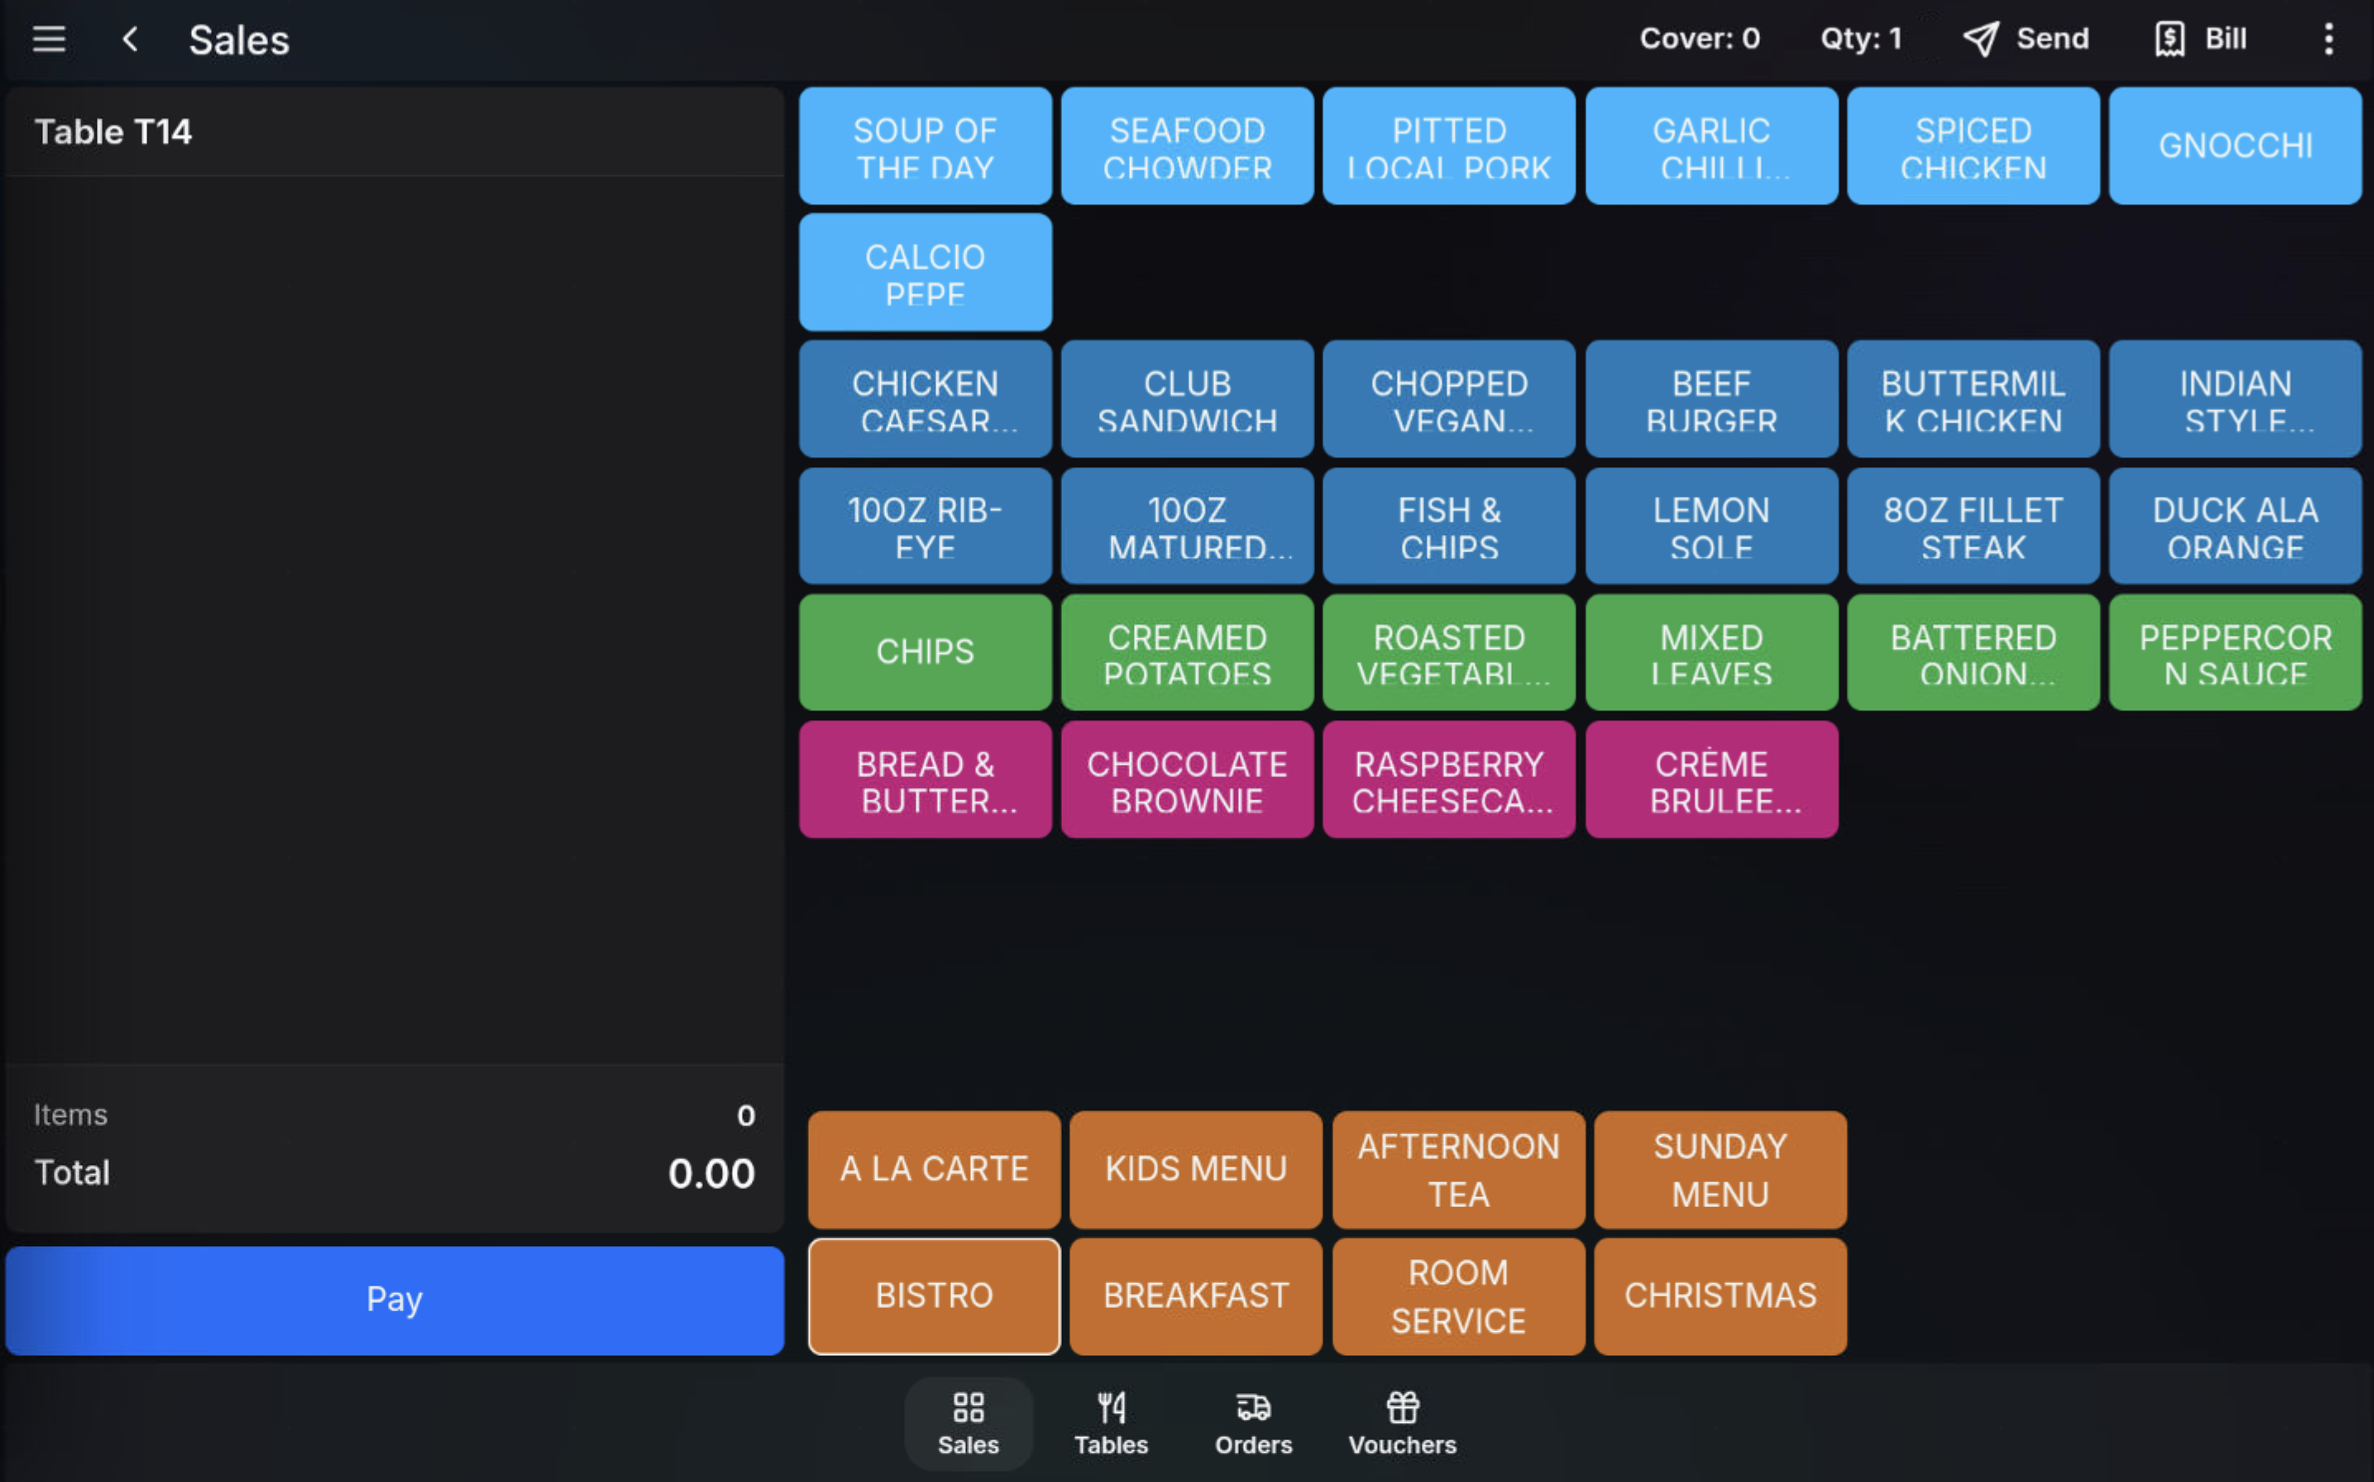
- Continue to the sales screen.
Select the first cover
- Press the Cover control at the top of the sales screen.
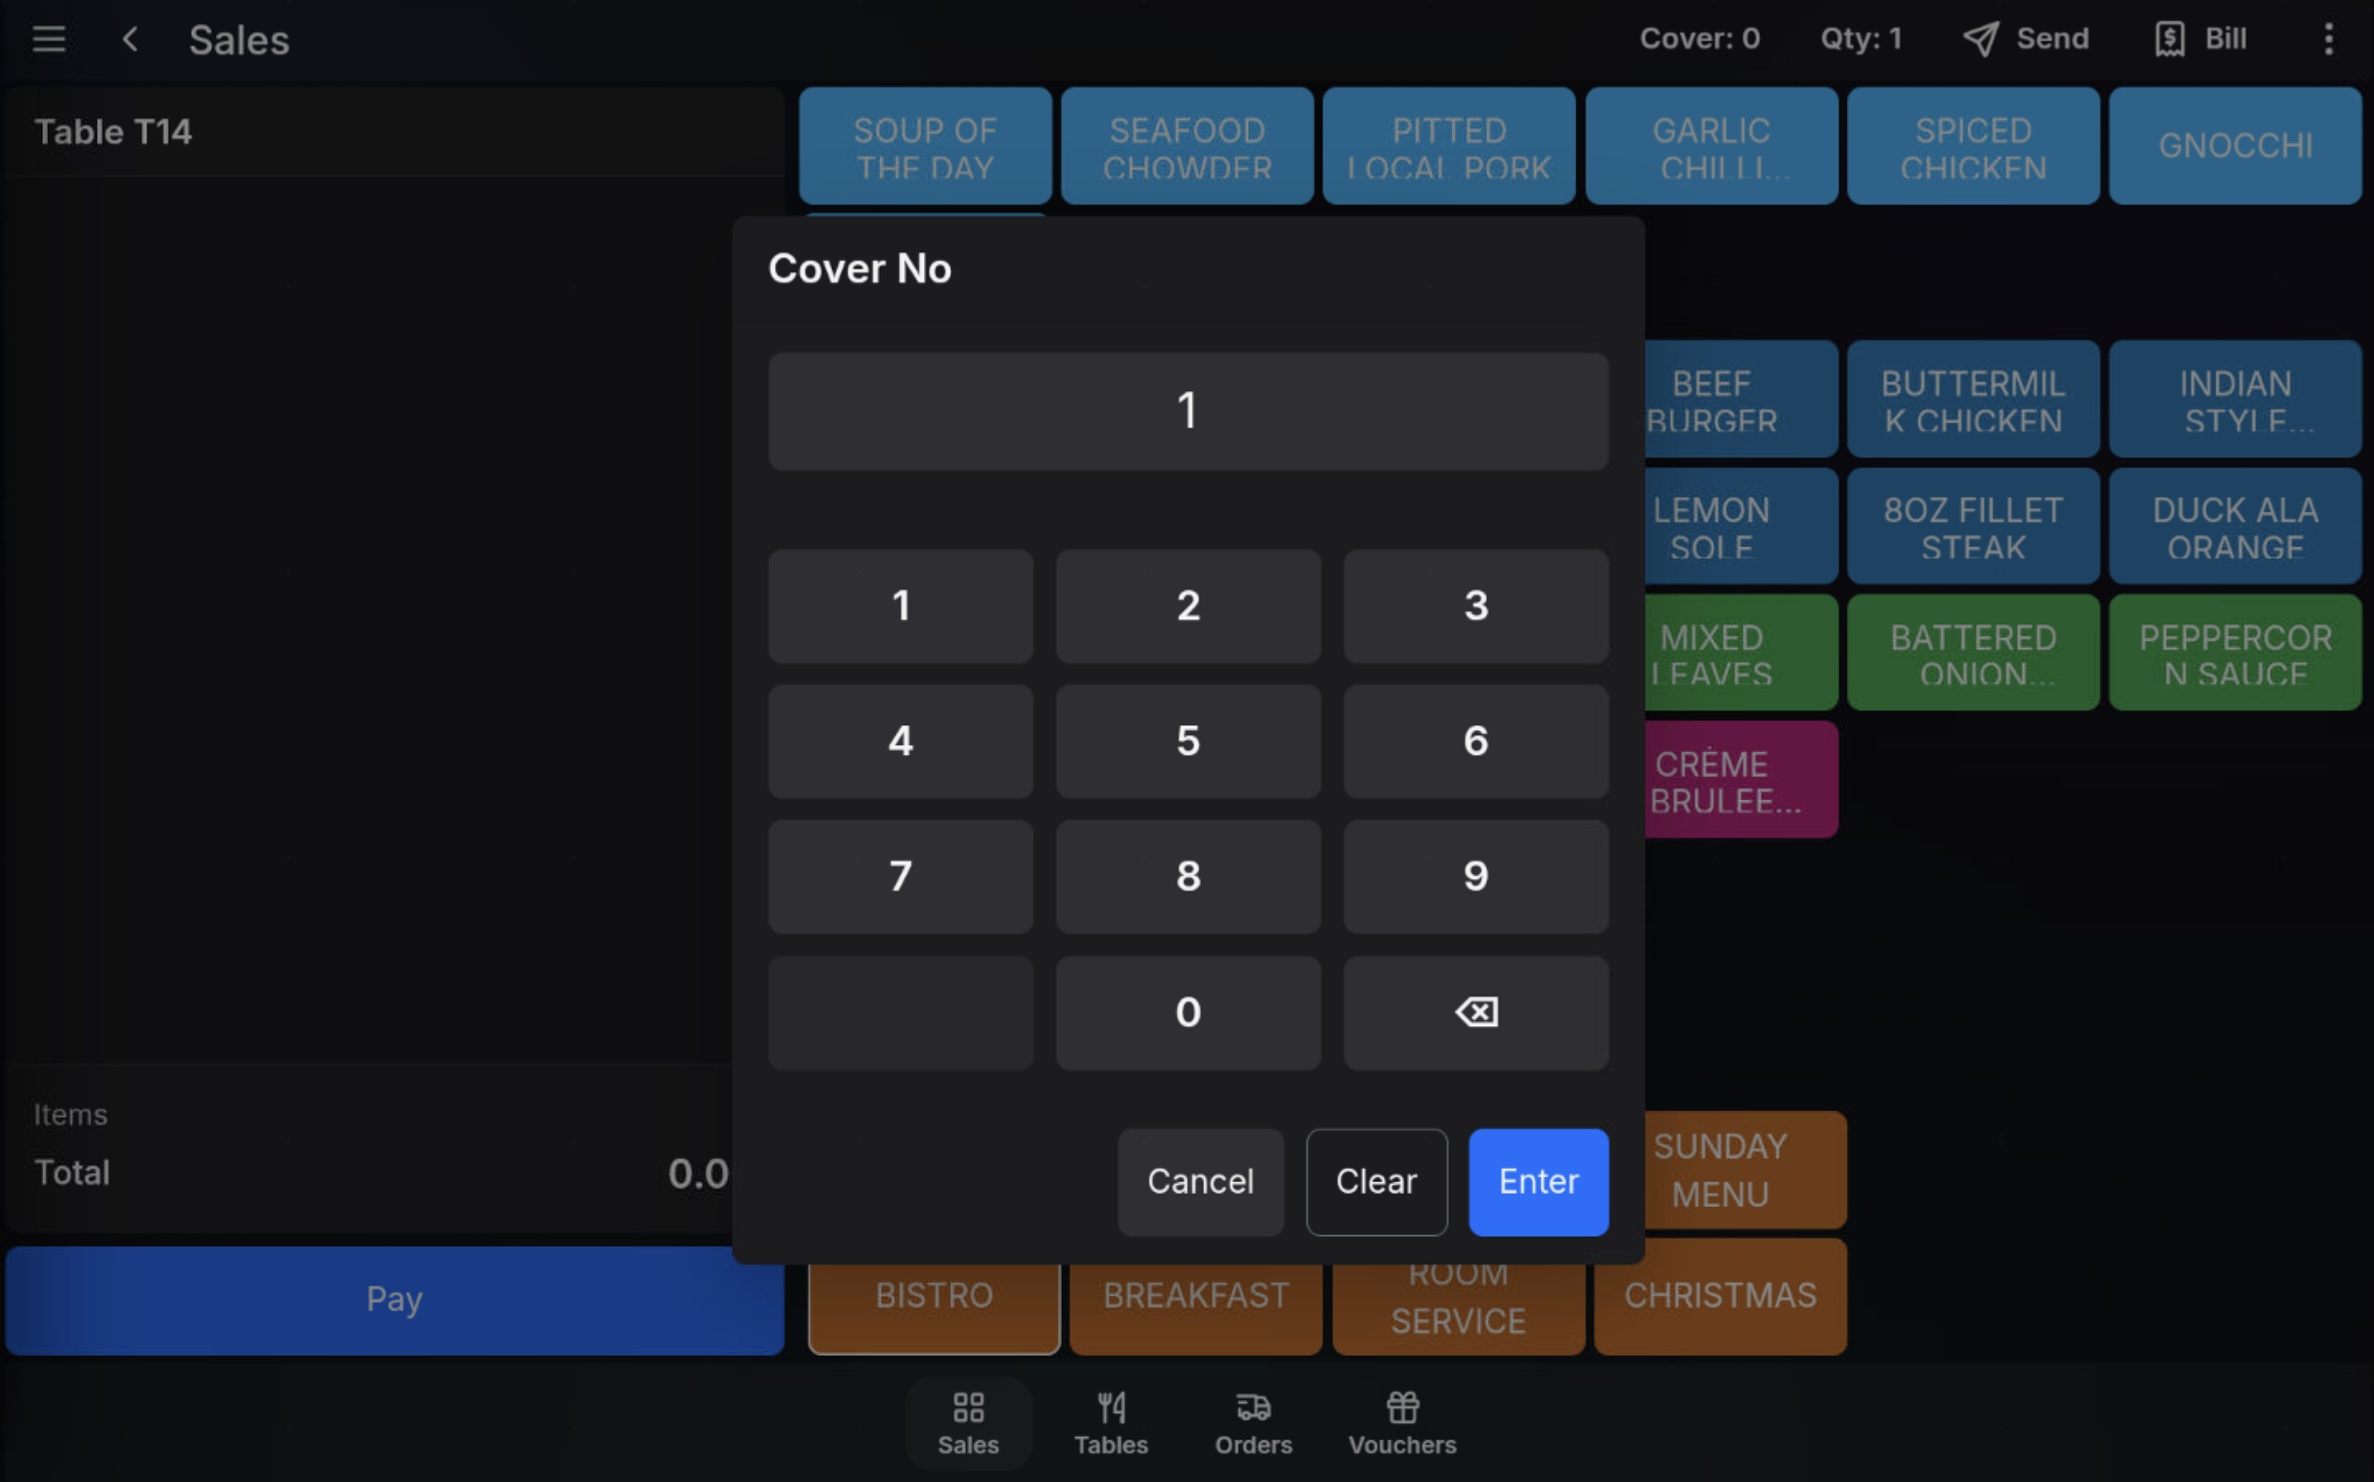
- Enter the cover number.
- Press Enter.
Add products for the cover
- Select lookup menus and product buttons as normal.
- The items are added under the selected cover in the transaction grid.
- Check any modifiers, Sales Menus, Condiment Products, and Condiment Messages before moving to the next cover.
Add products for another cover
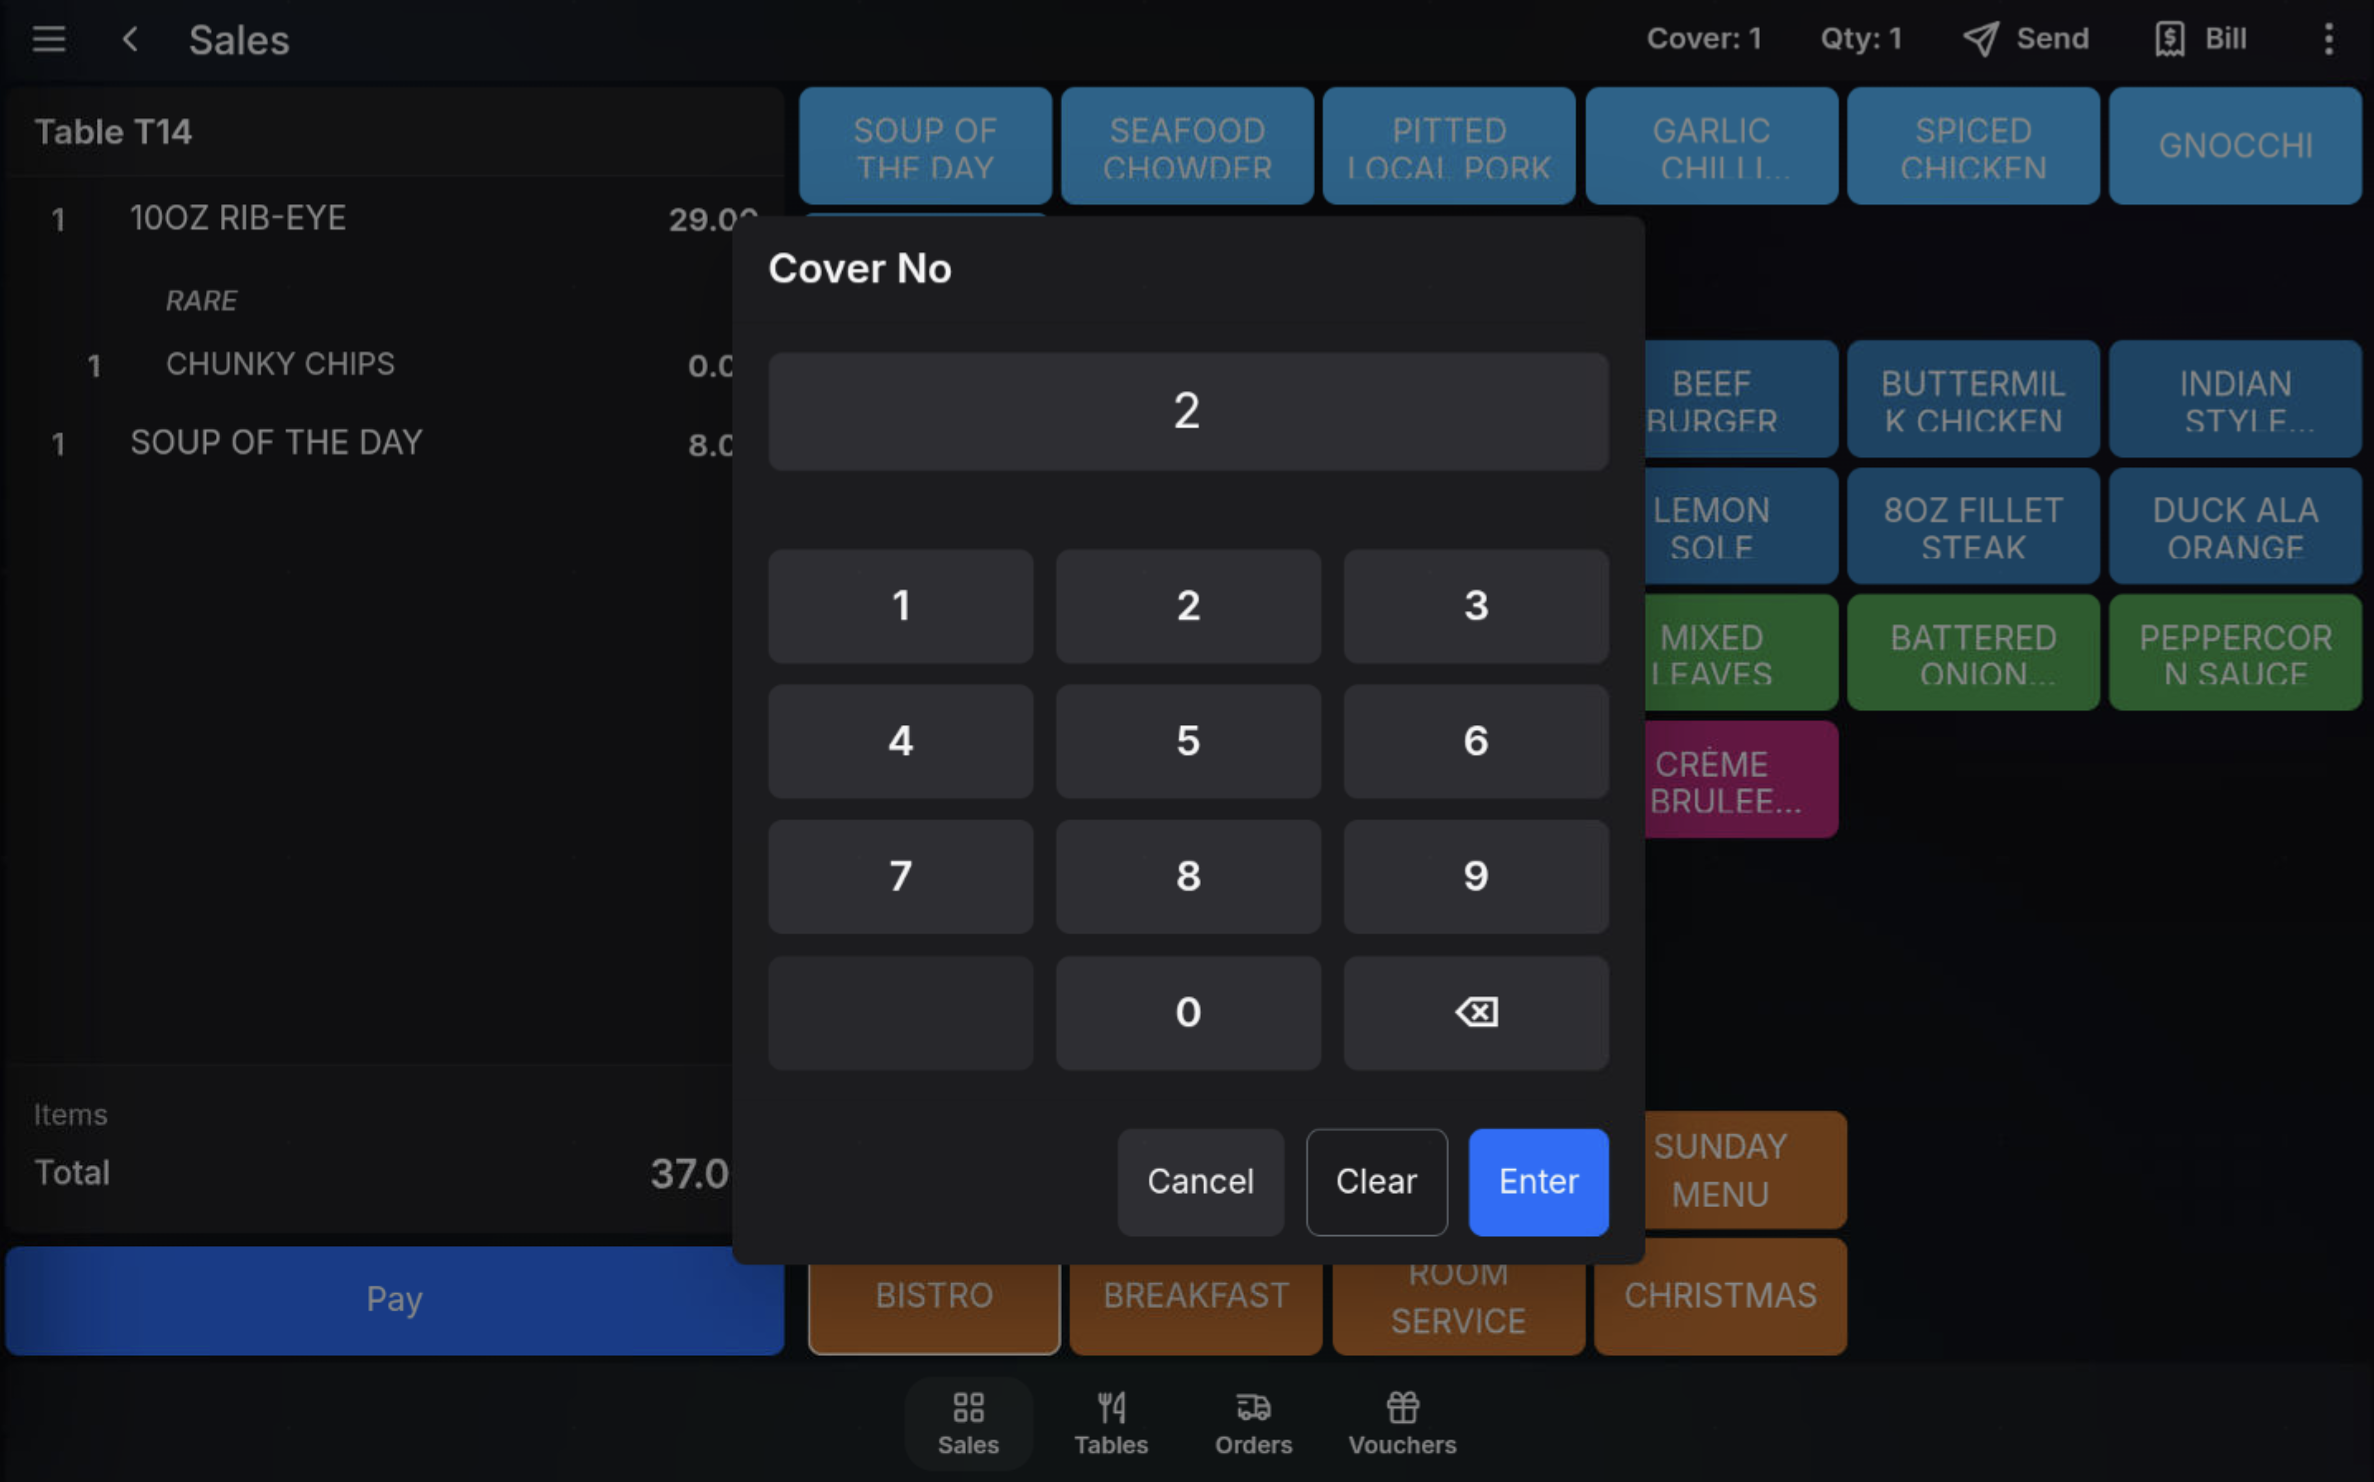
- Press the Cover control again.
- Enter the next cover number.
- Press Enter, then add the products for that guest.
- Repeat for each cover as required.
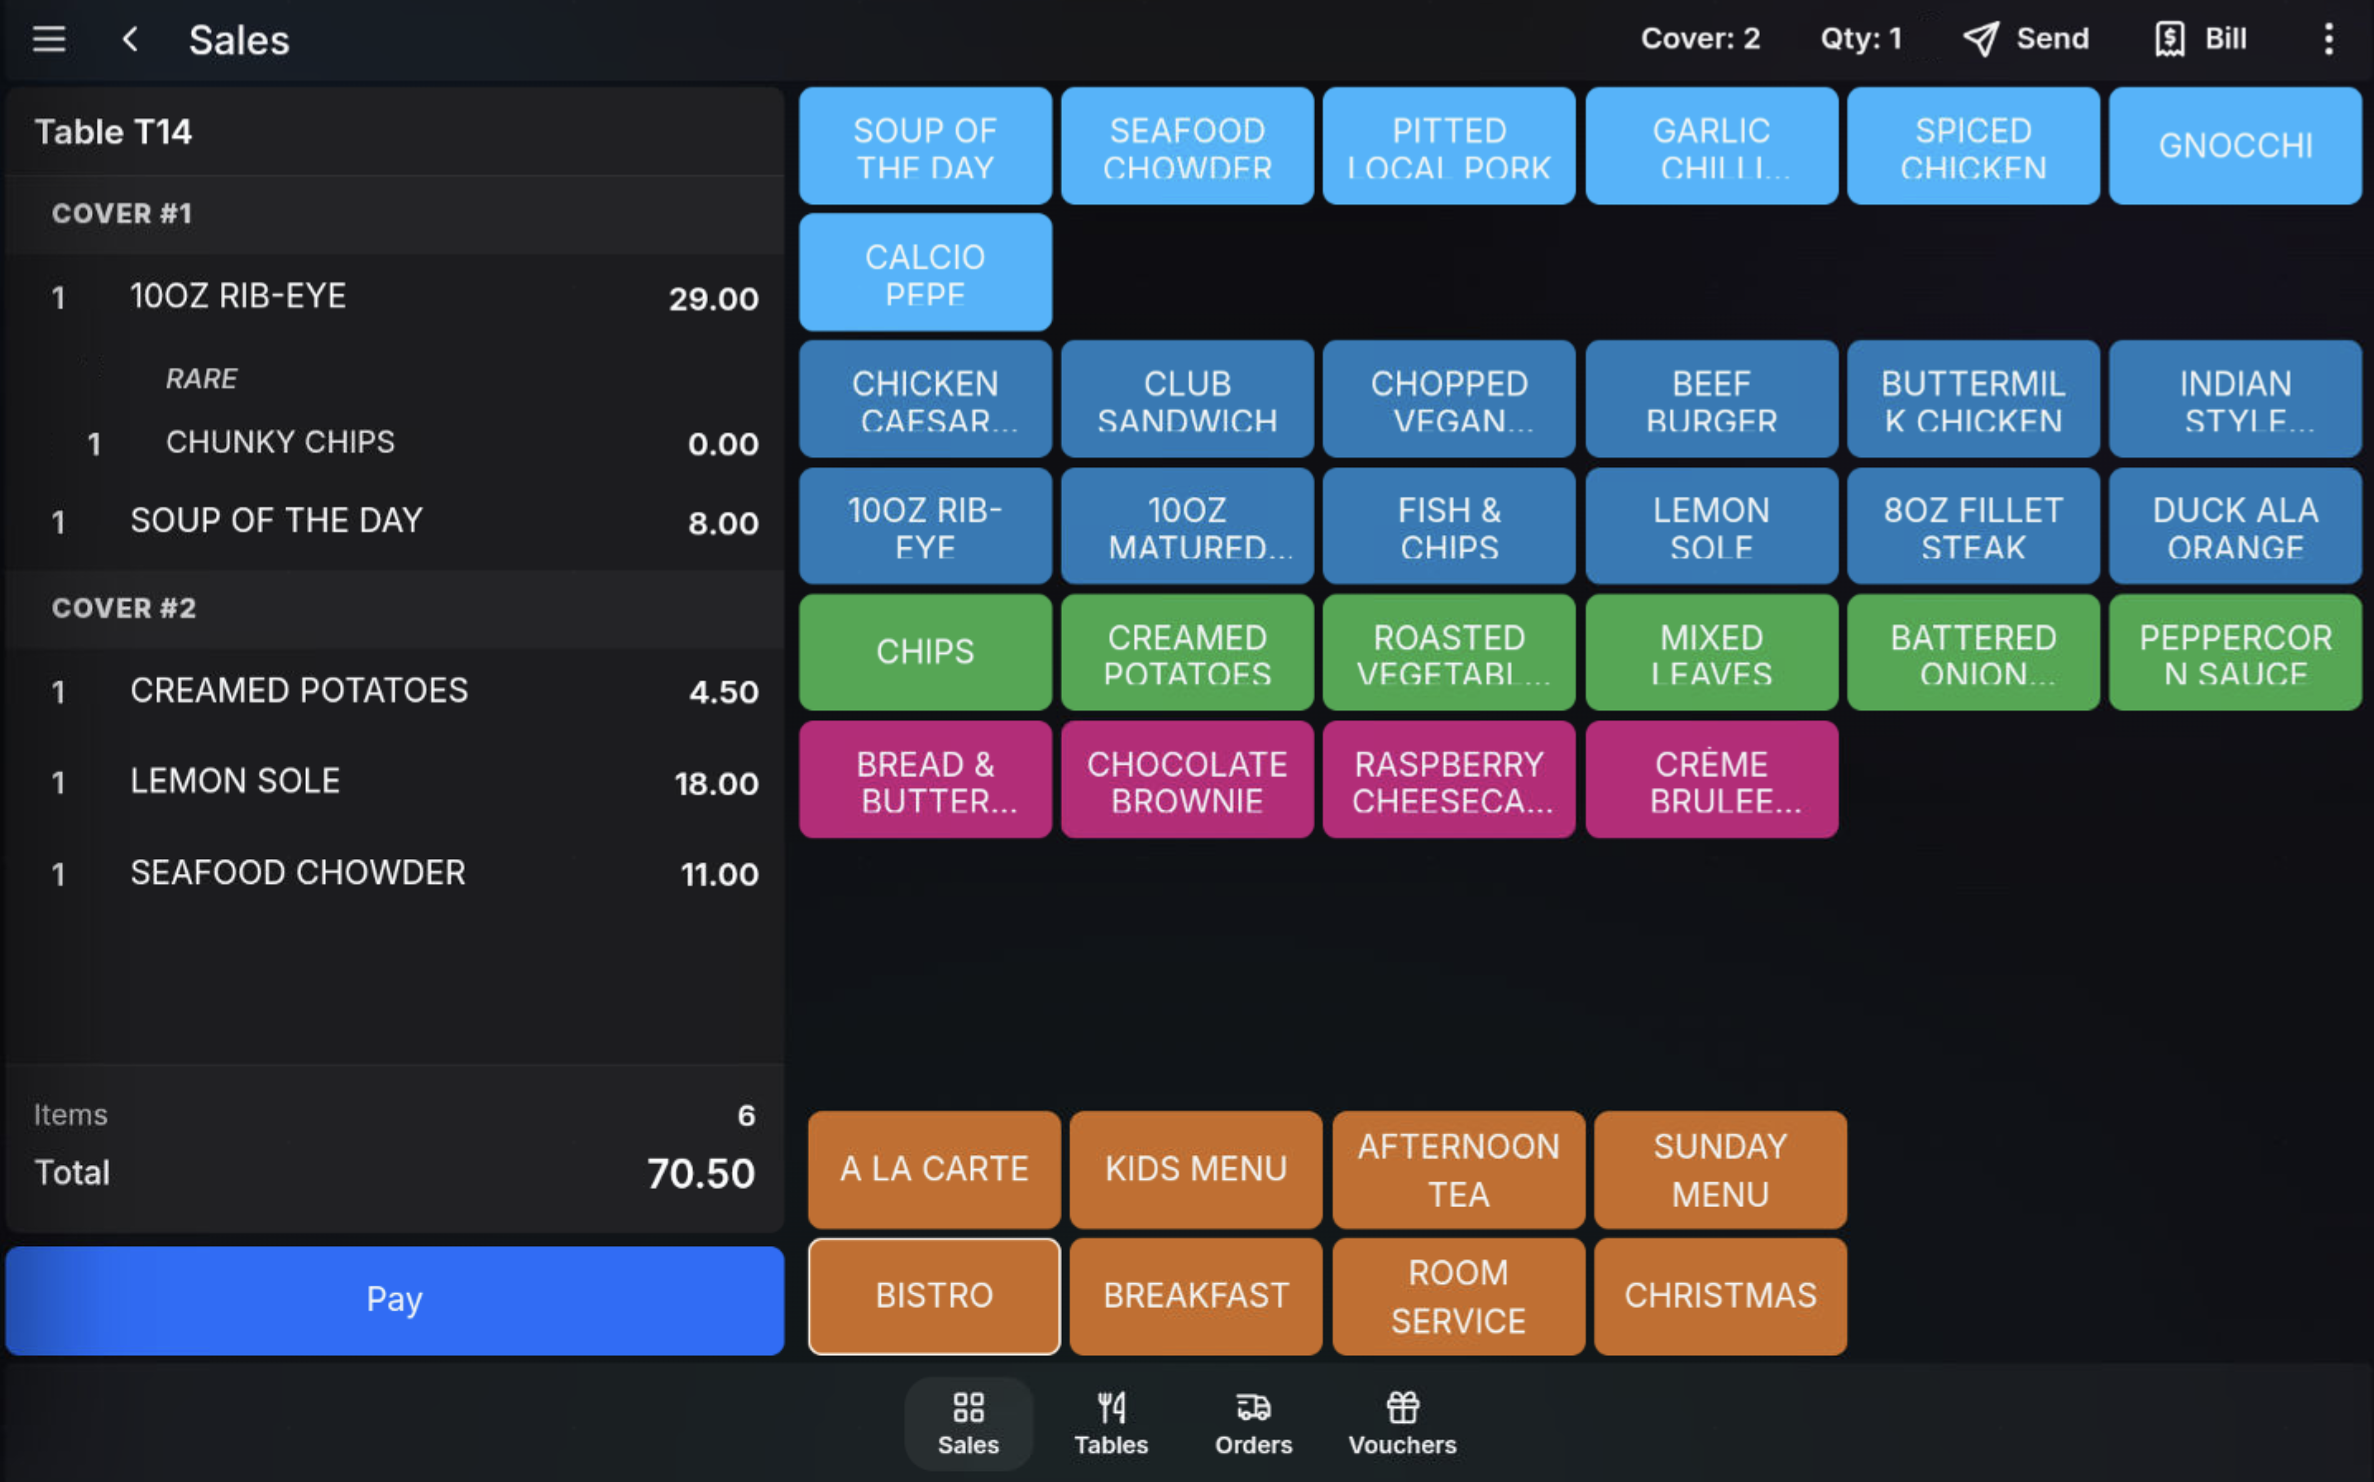
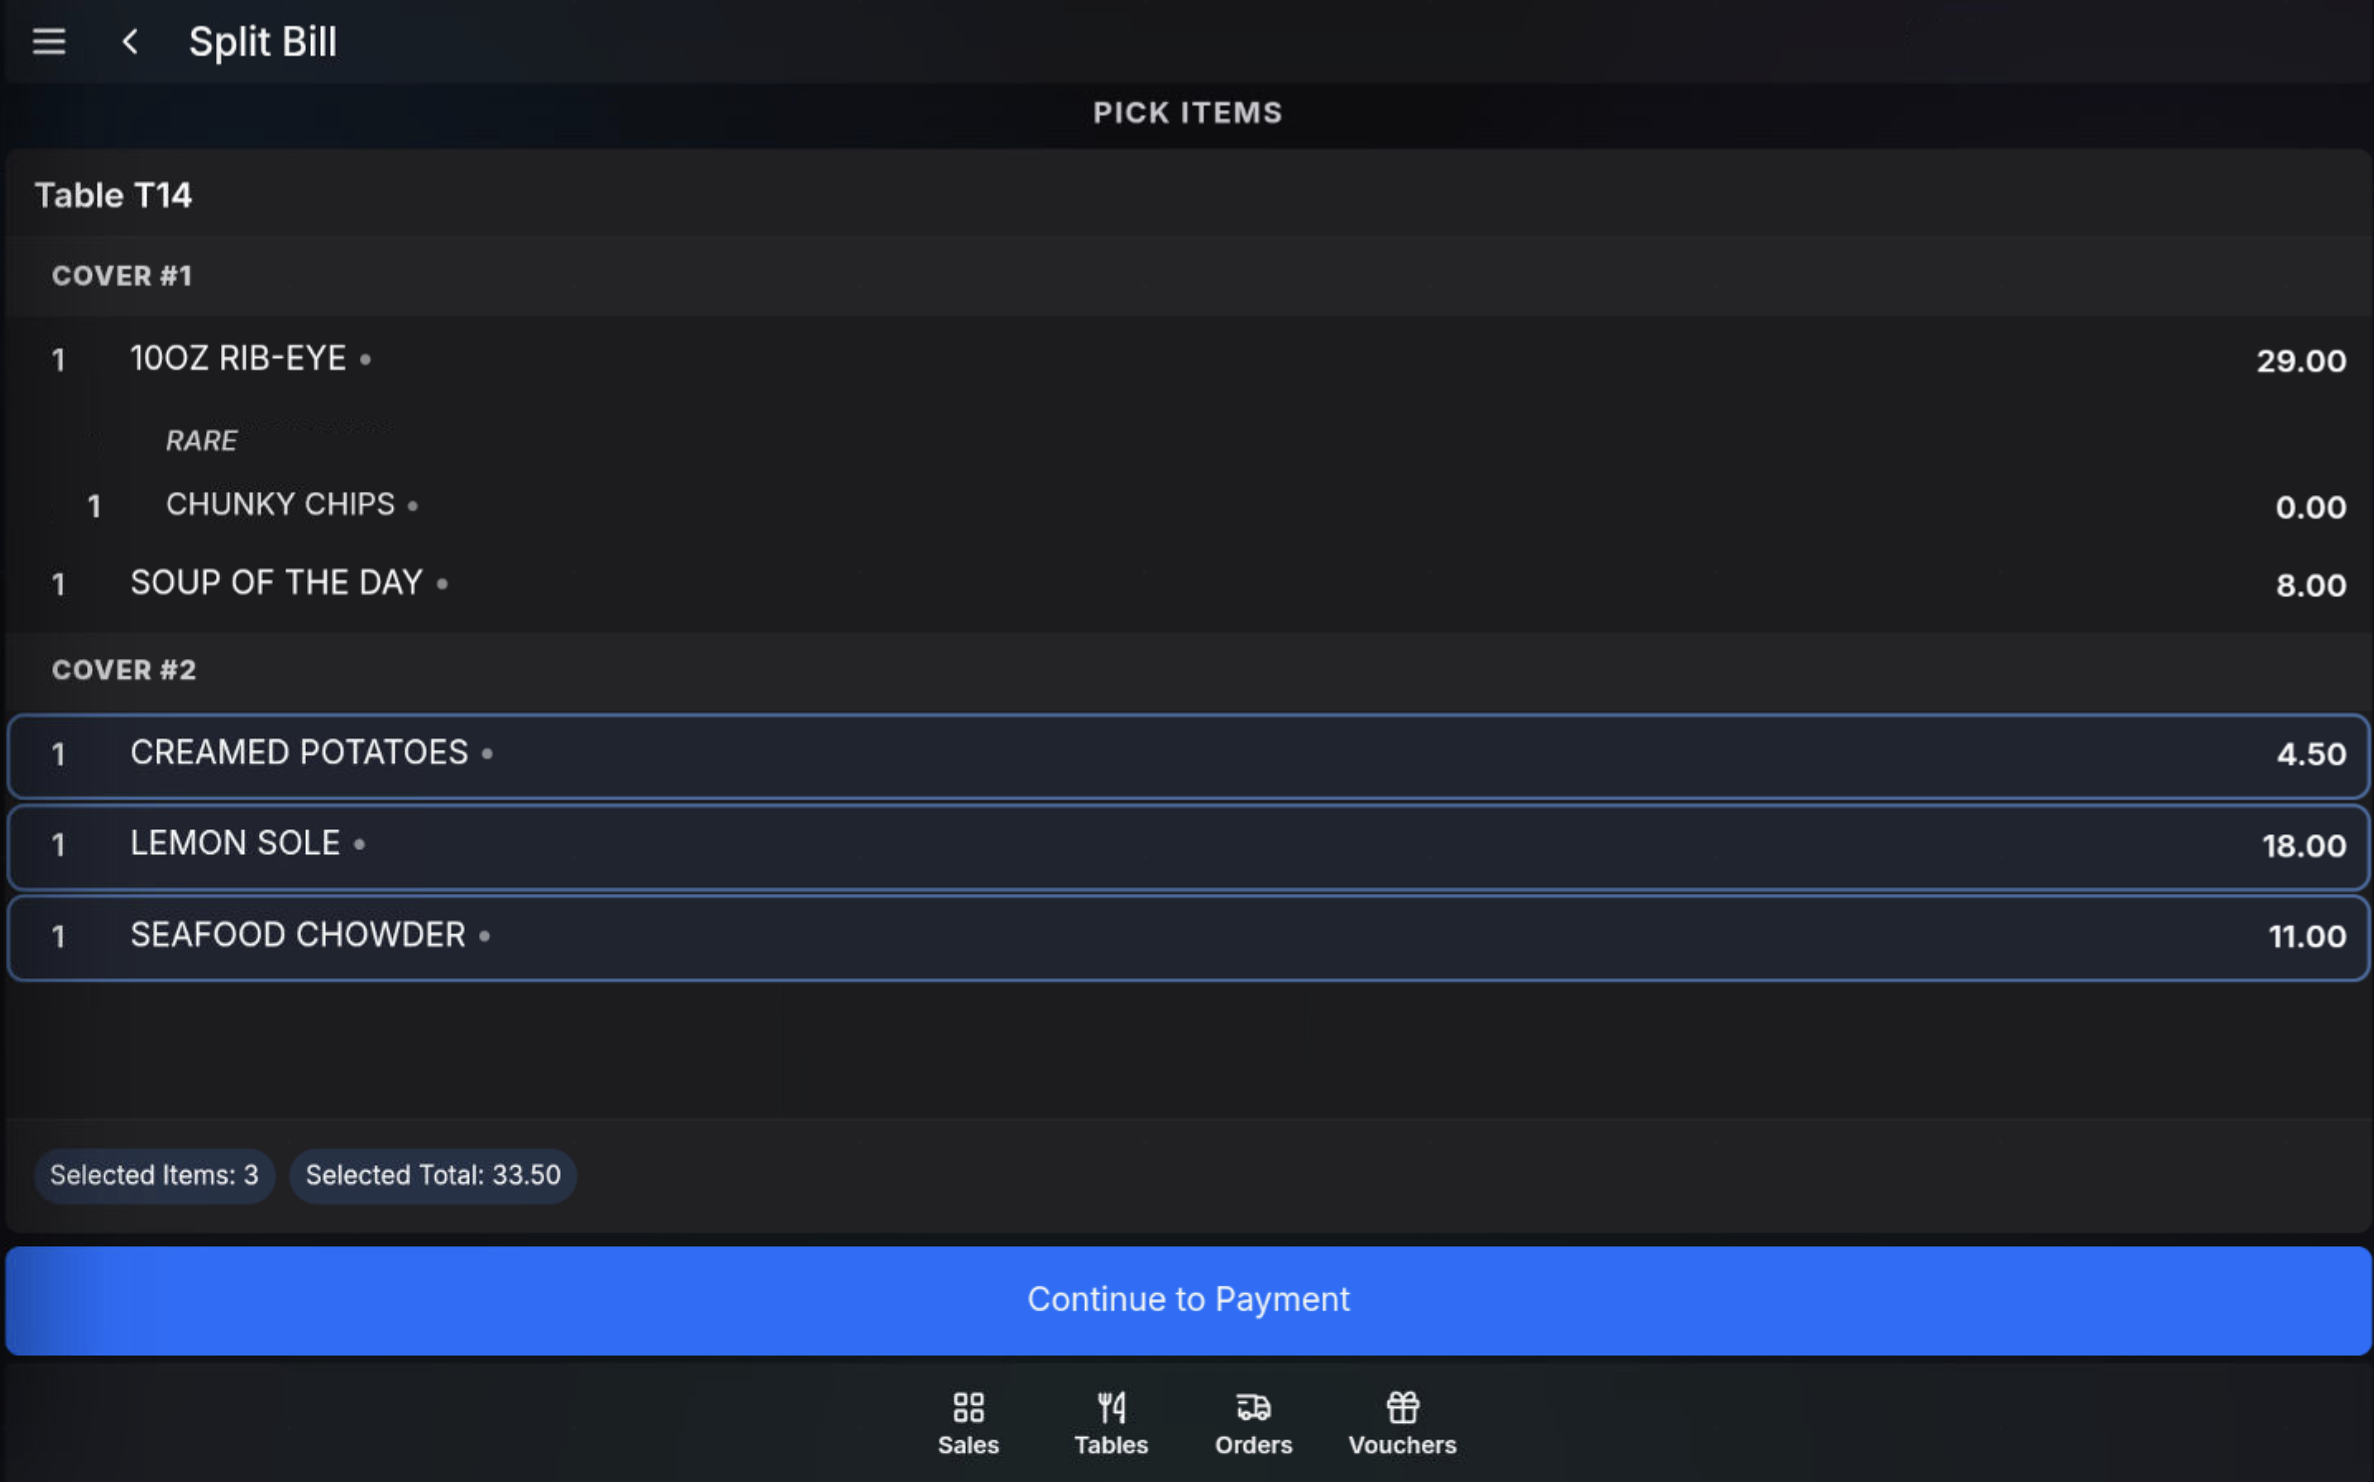
Split Bill: If items are added by cover, the Split Bill screen can group items by cover so one or more covers can be selected for payment.
FAQ
Do I have to use covers on every table?
No. Use covers when you want to group items by guest, especially when the table may be split by cover later.
Can I still split a bill if items were not added by cover?
Yes. You can still select individual items in Split Bill, but using covers makes it quicker to choose all items for one guest.