TapaPay bank account setup
Use this guide after the main onboarding application has been submitted to add and verify the payout bank account.
Have the business bank account details ready before you start. If the customer cannot use instant banking app verification, have a recent bank statement or another accepted bank document available too.
Step-by-step
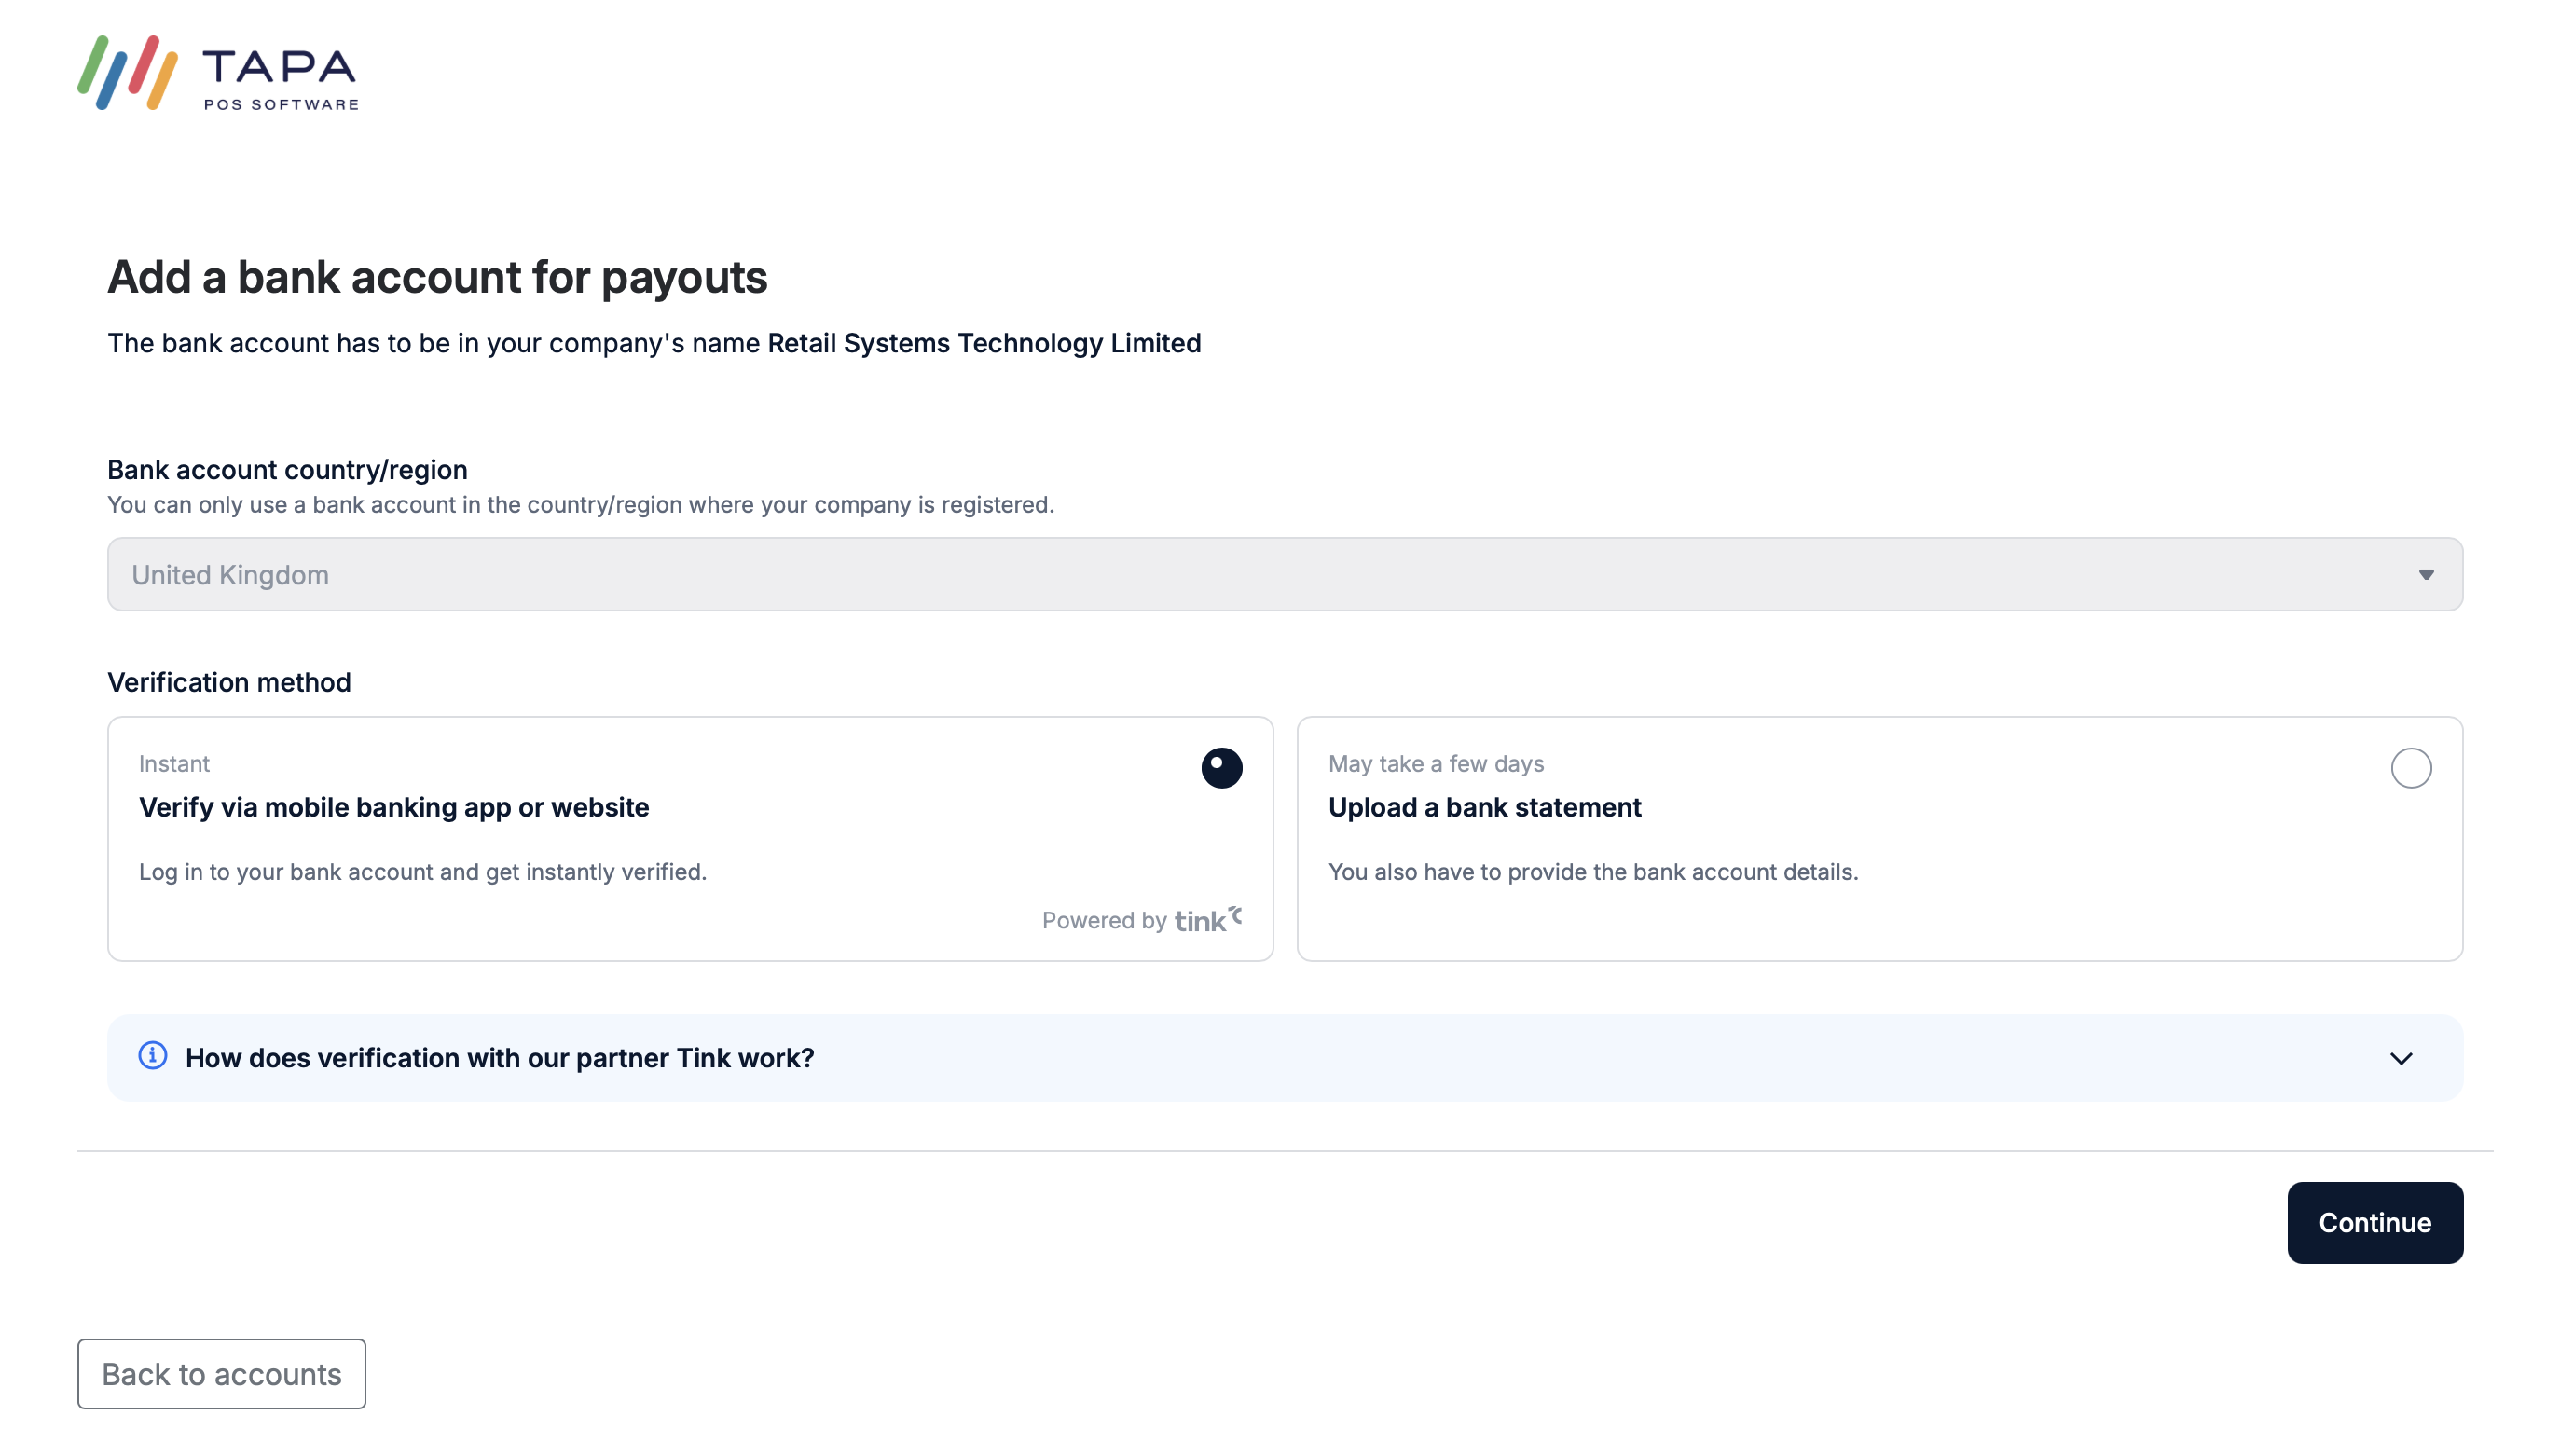
Step 1. Open Bank Details
After the main onboarding application is submitted, open Bank details and click Add bank account.

Step 2. Choose the verification method
Select either Verify via mobile banking app or website for instant verification, or Upload a bank statement if the customer cannot use the app route.
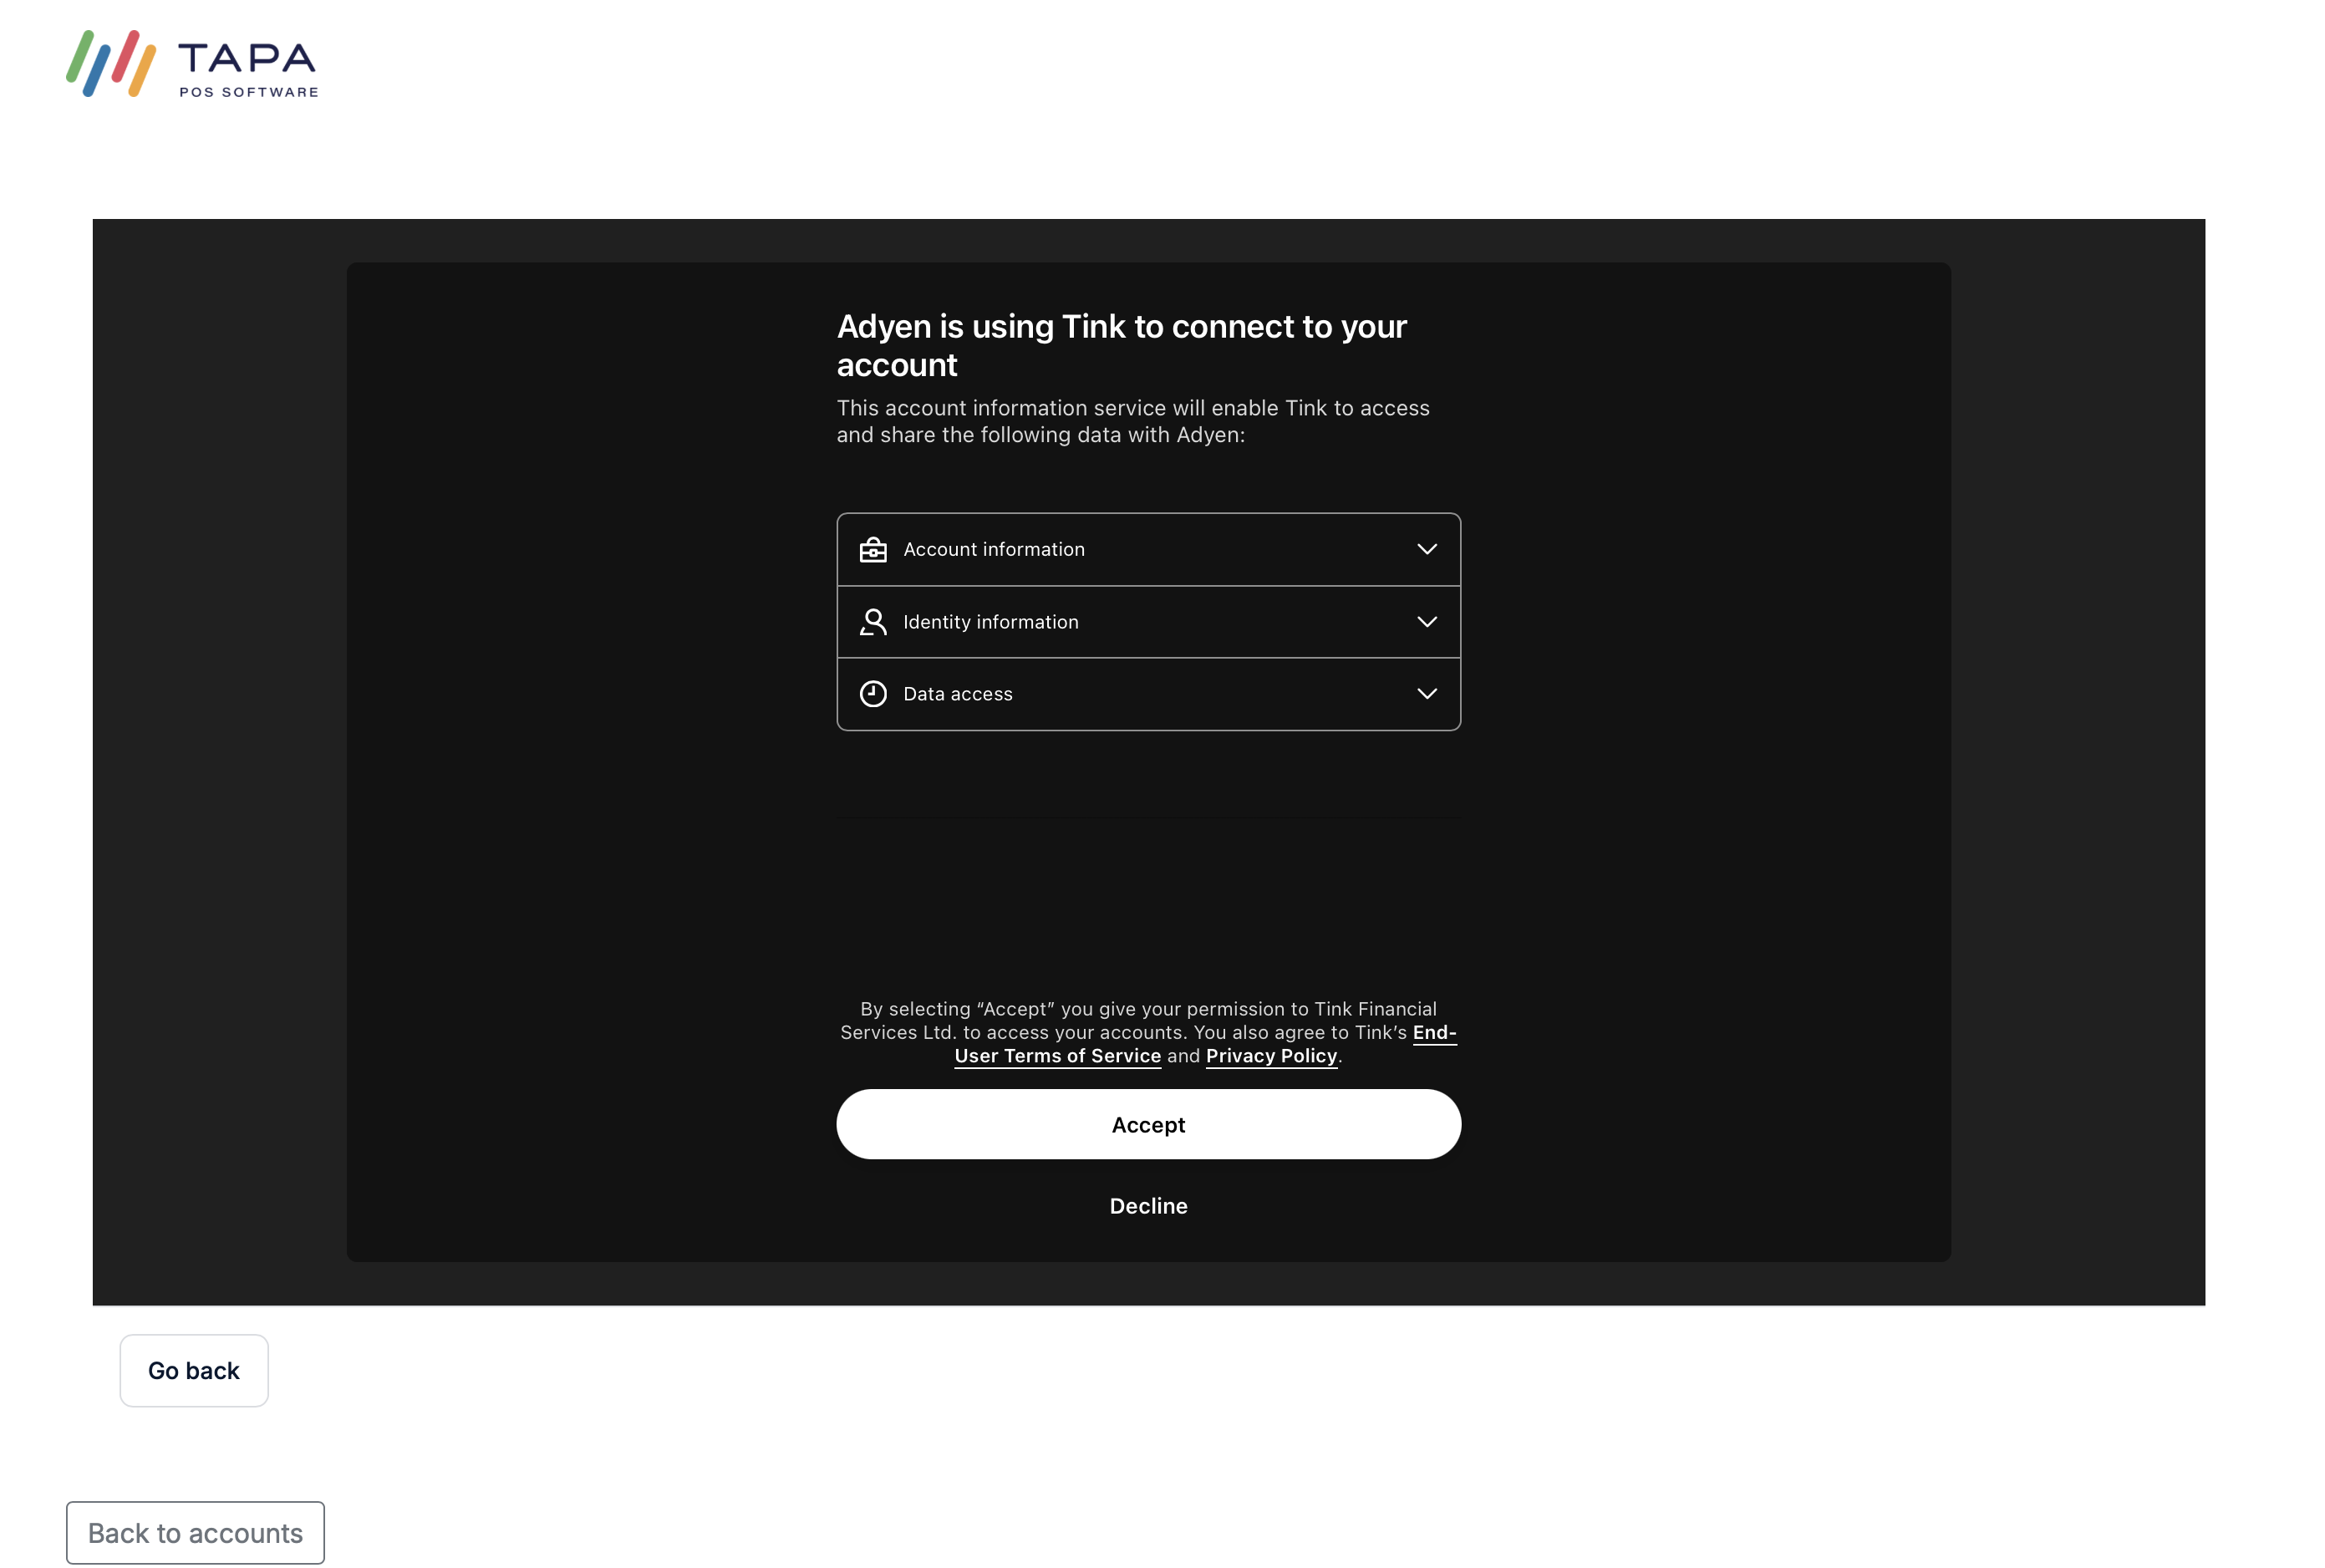
Step 3. Allow access to the banking app using Tink
Review the Tink consent screen and click Accept to allow the secure bank connection.
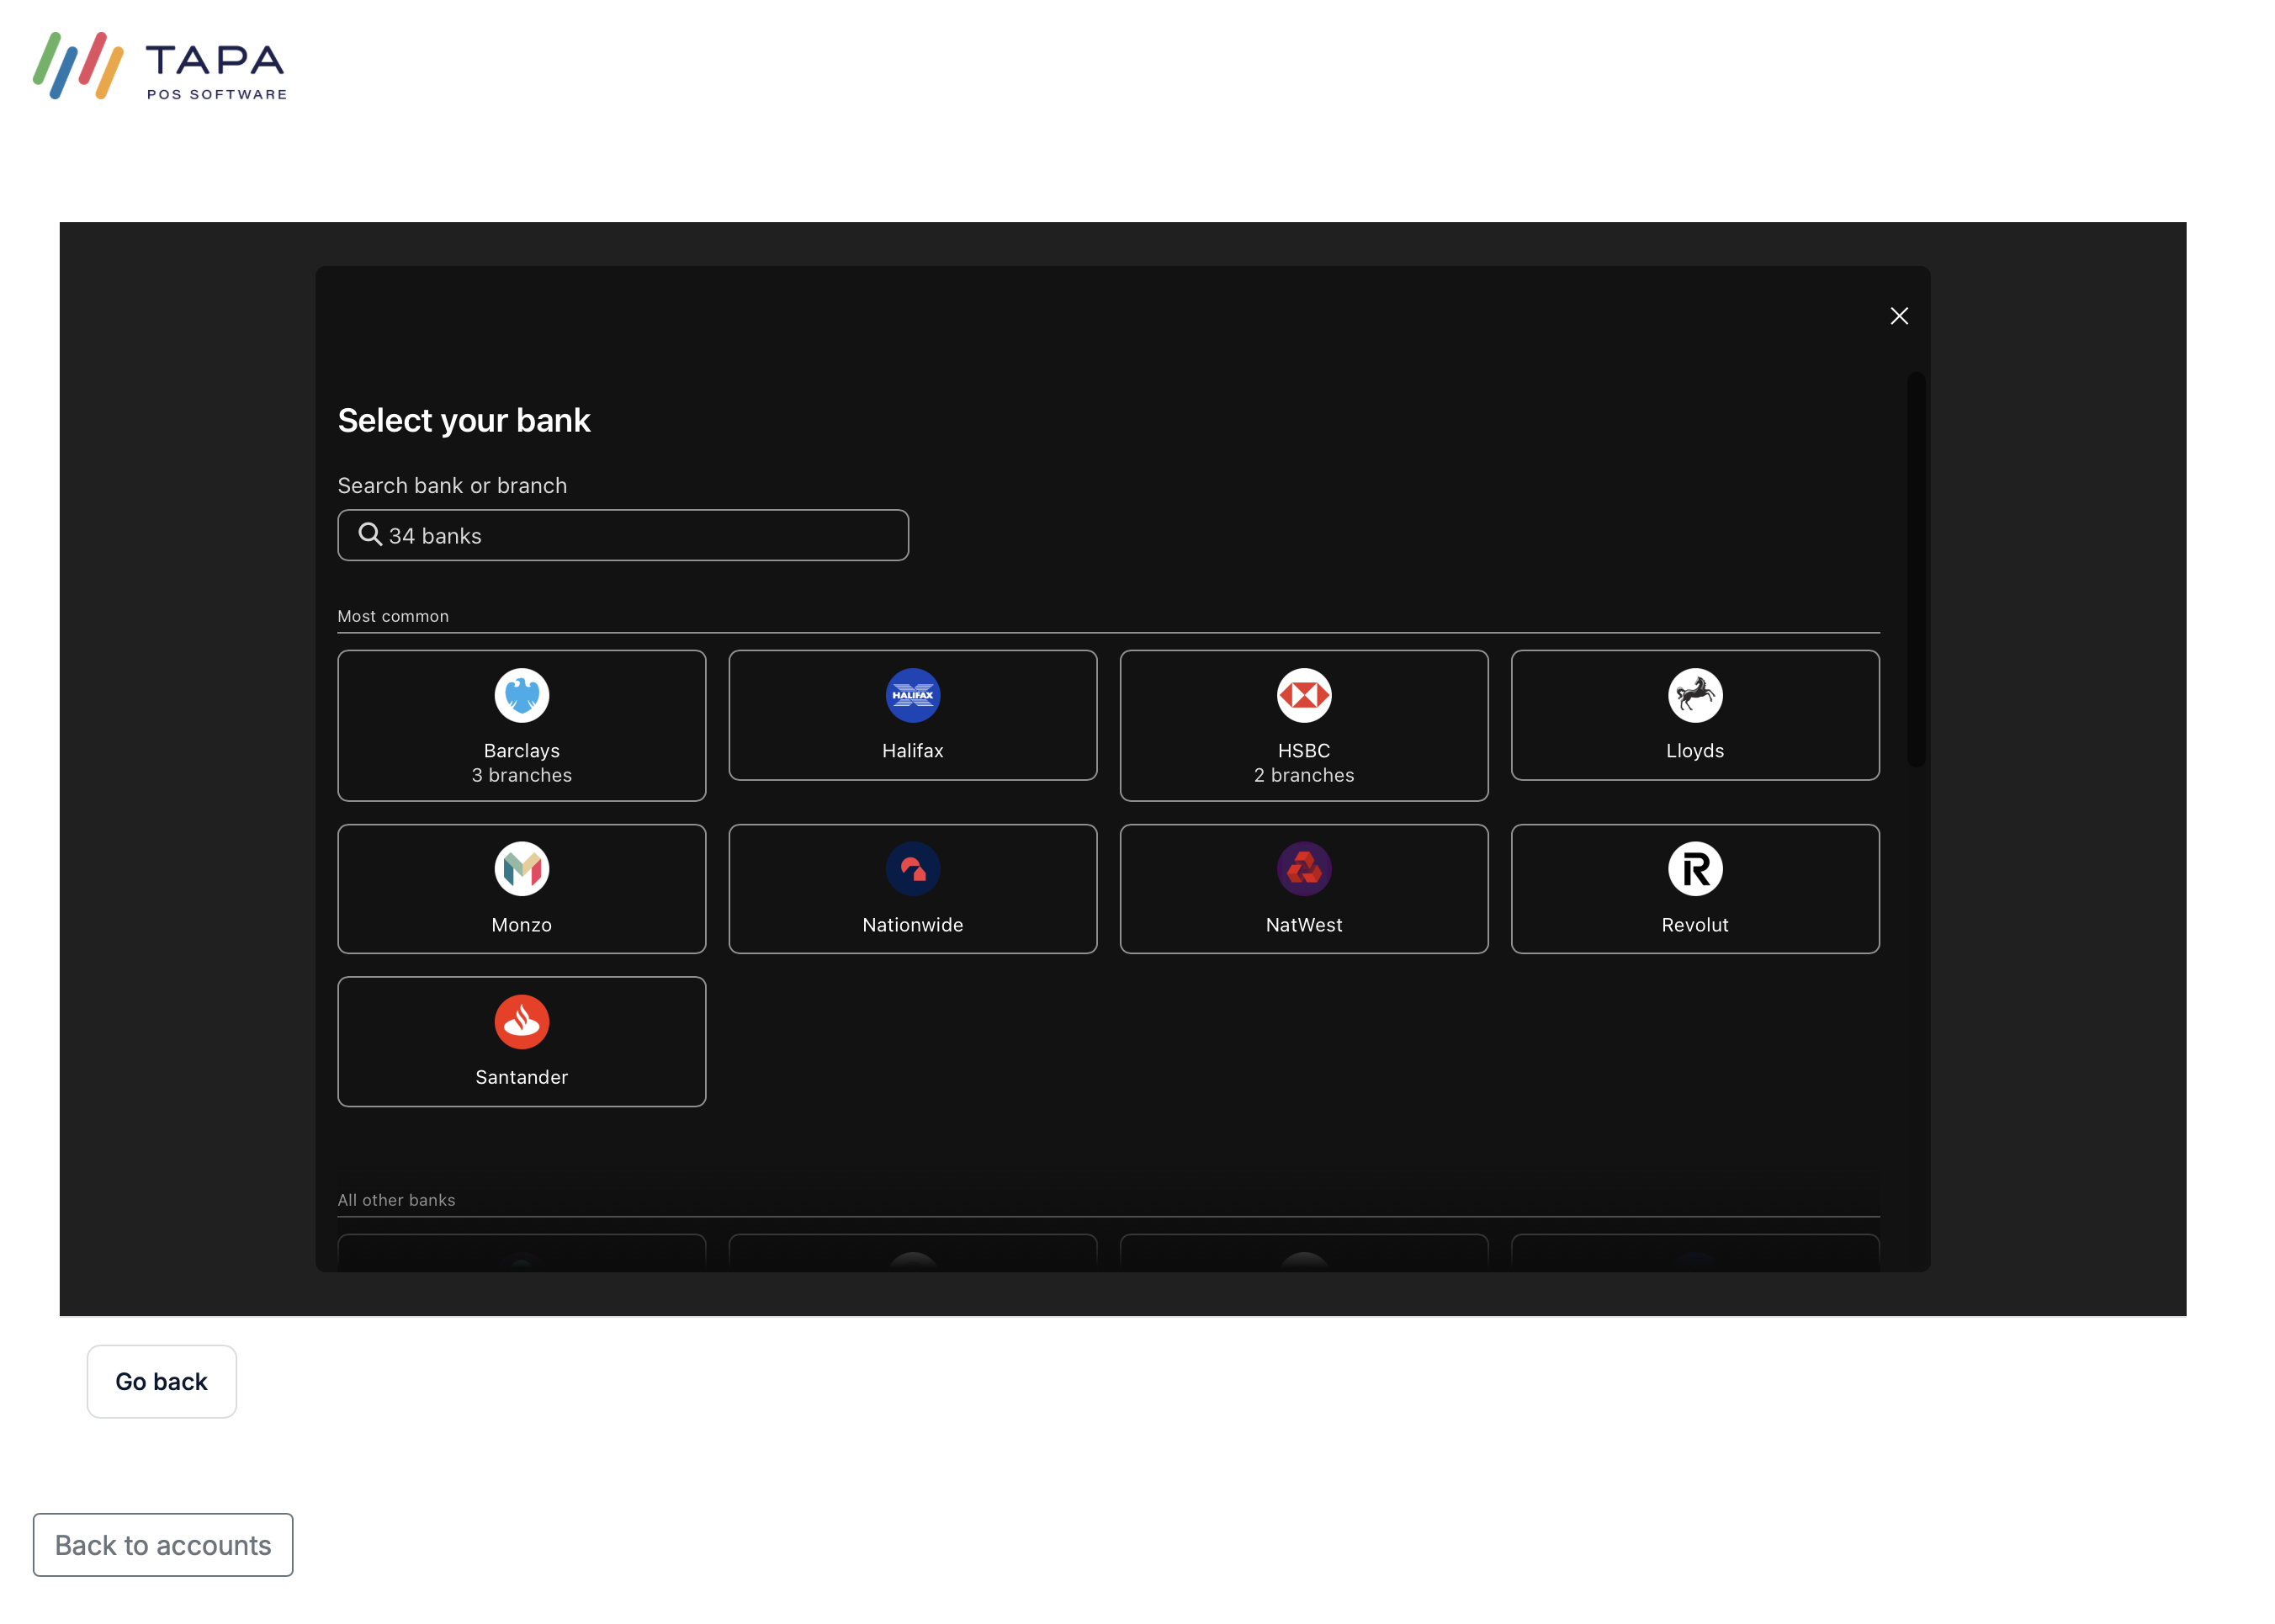
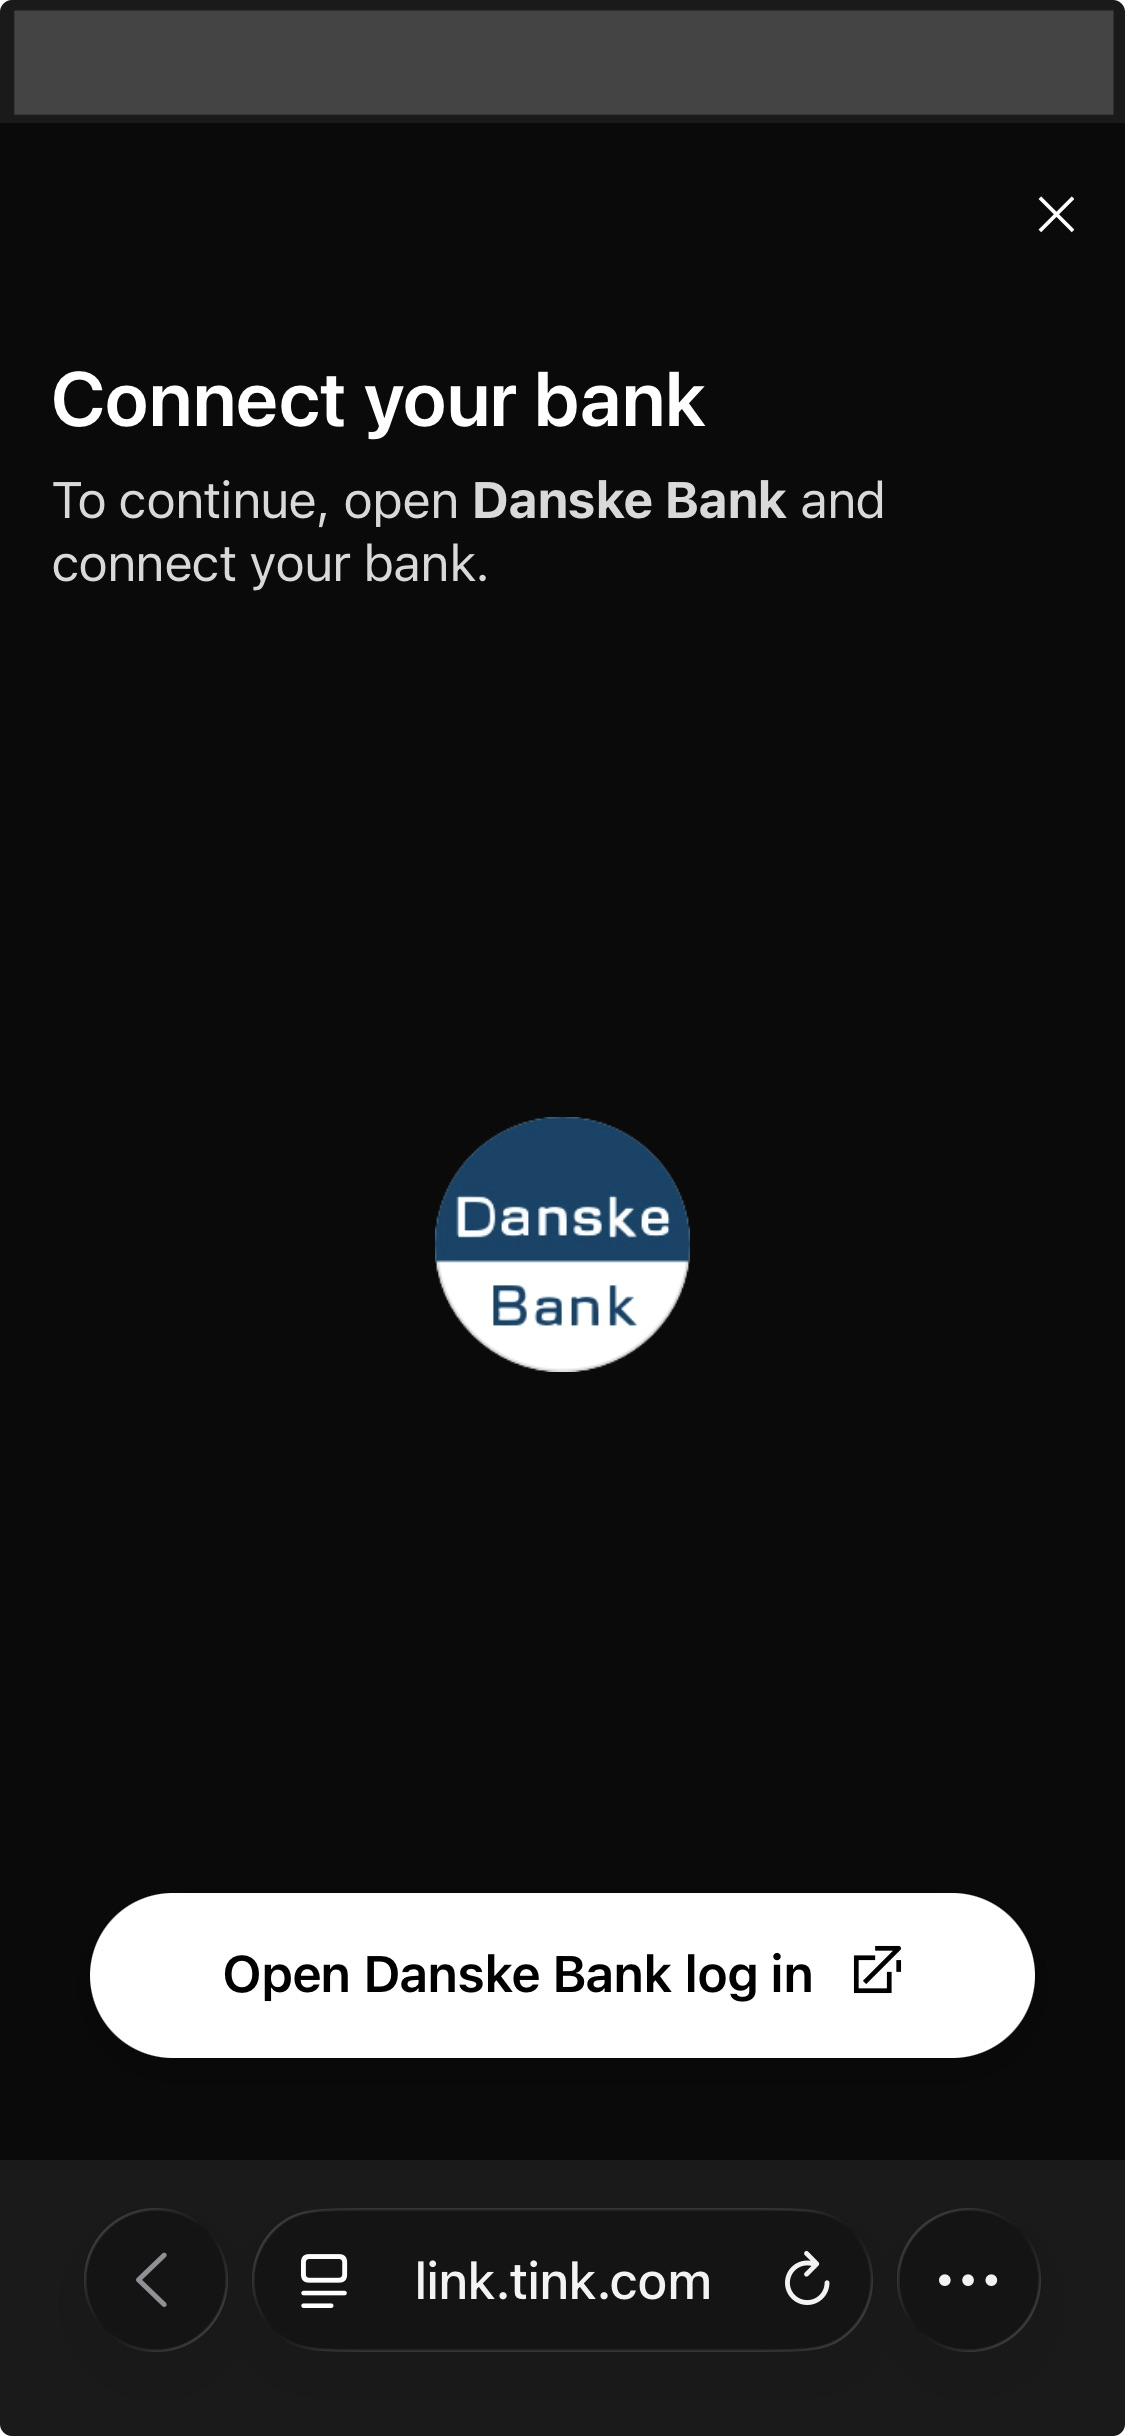
Next, choose the customer's bank from the list shown by the bank connection flow.
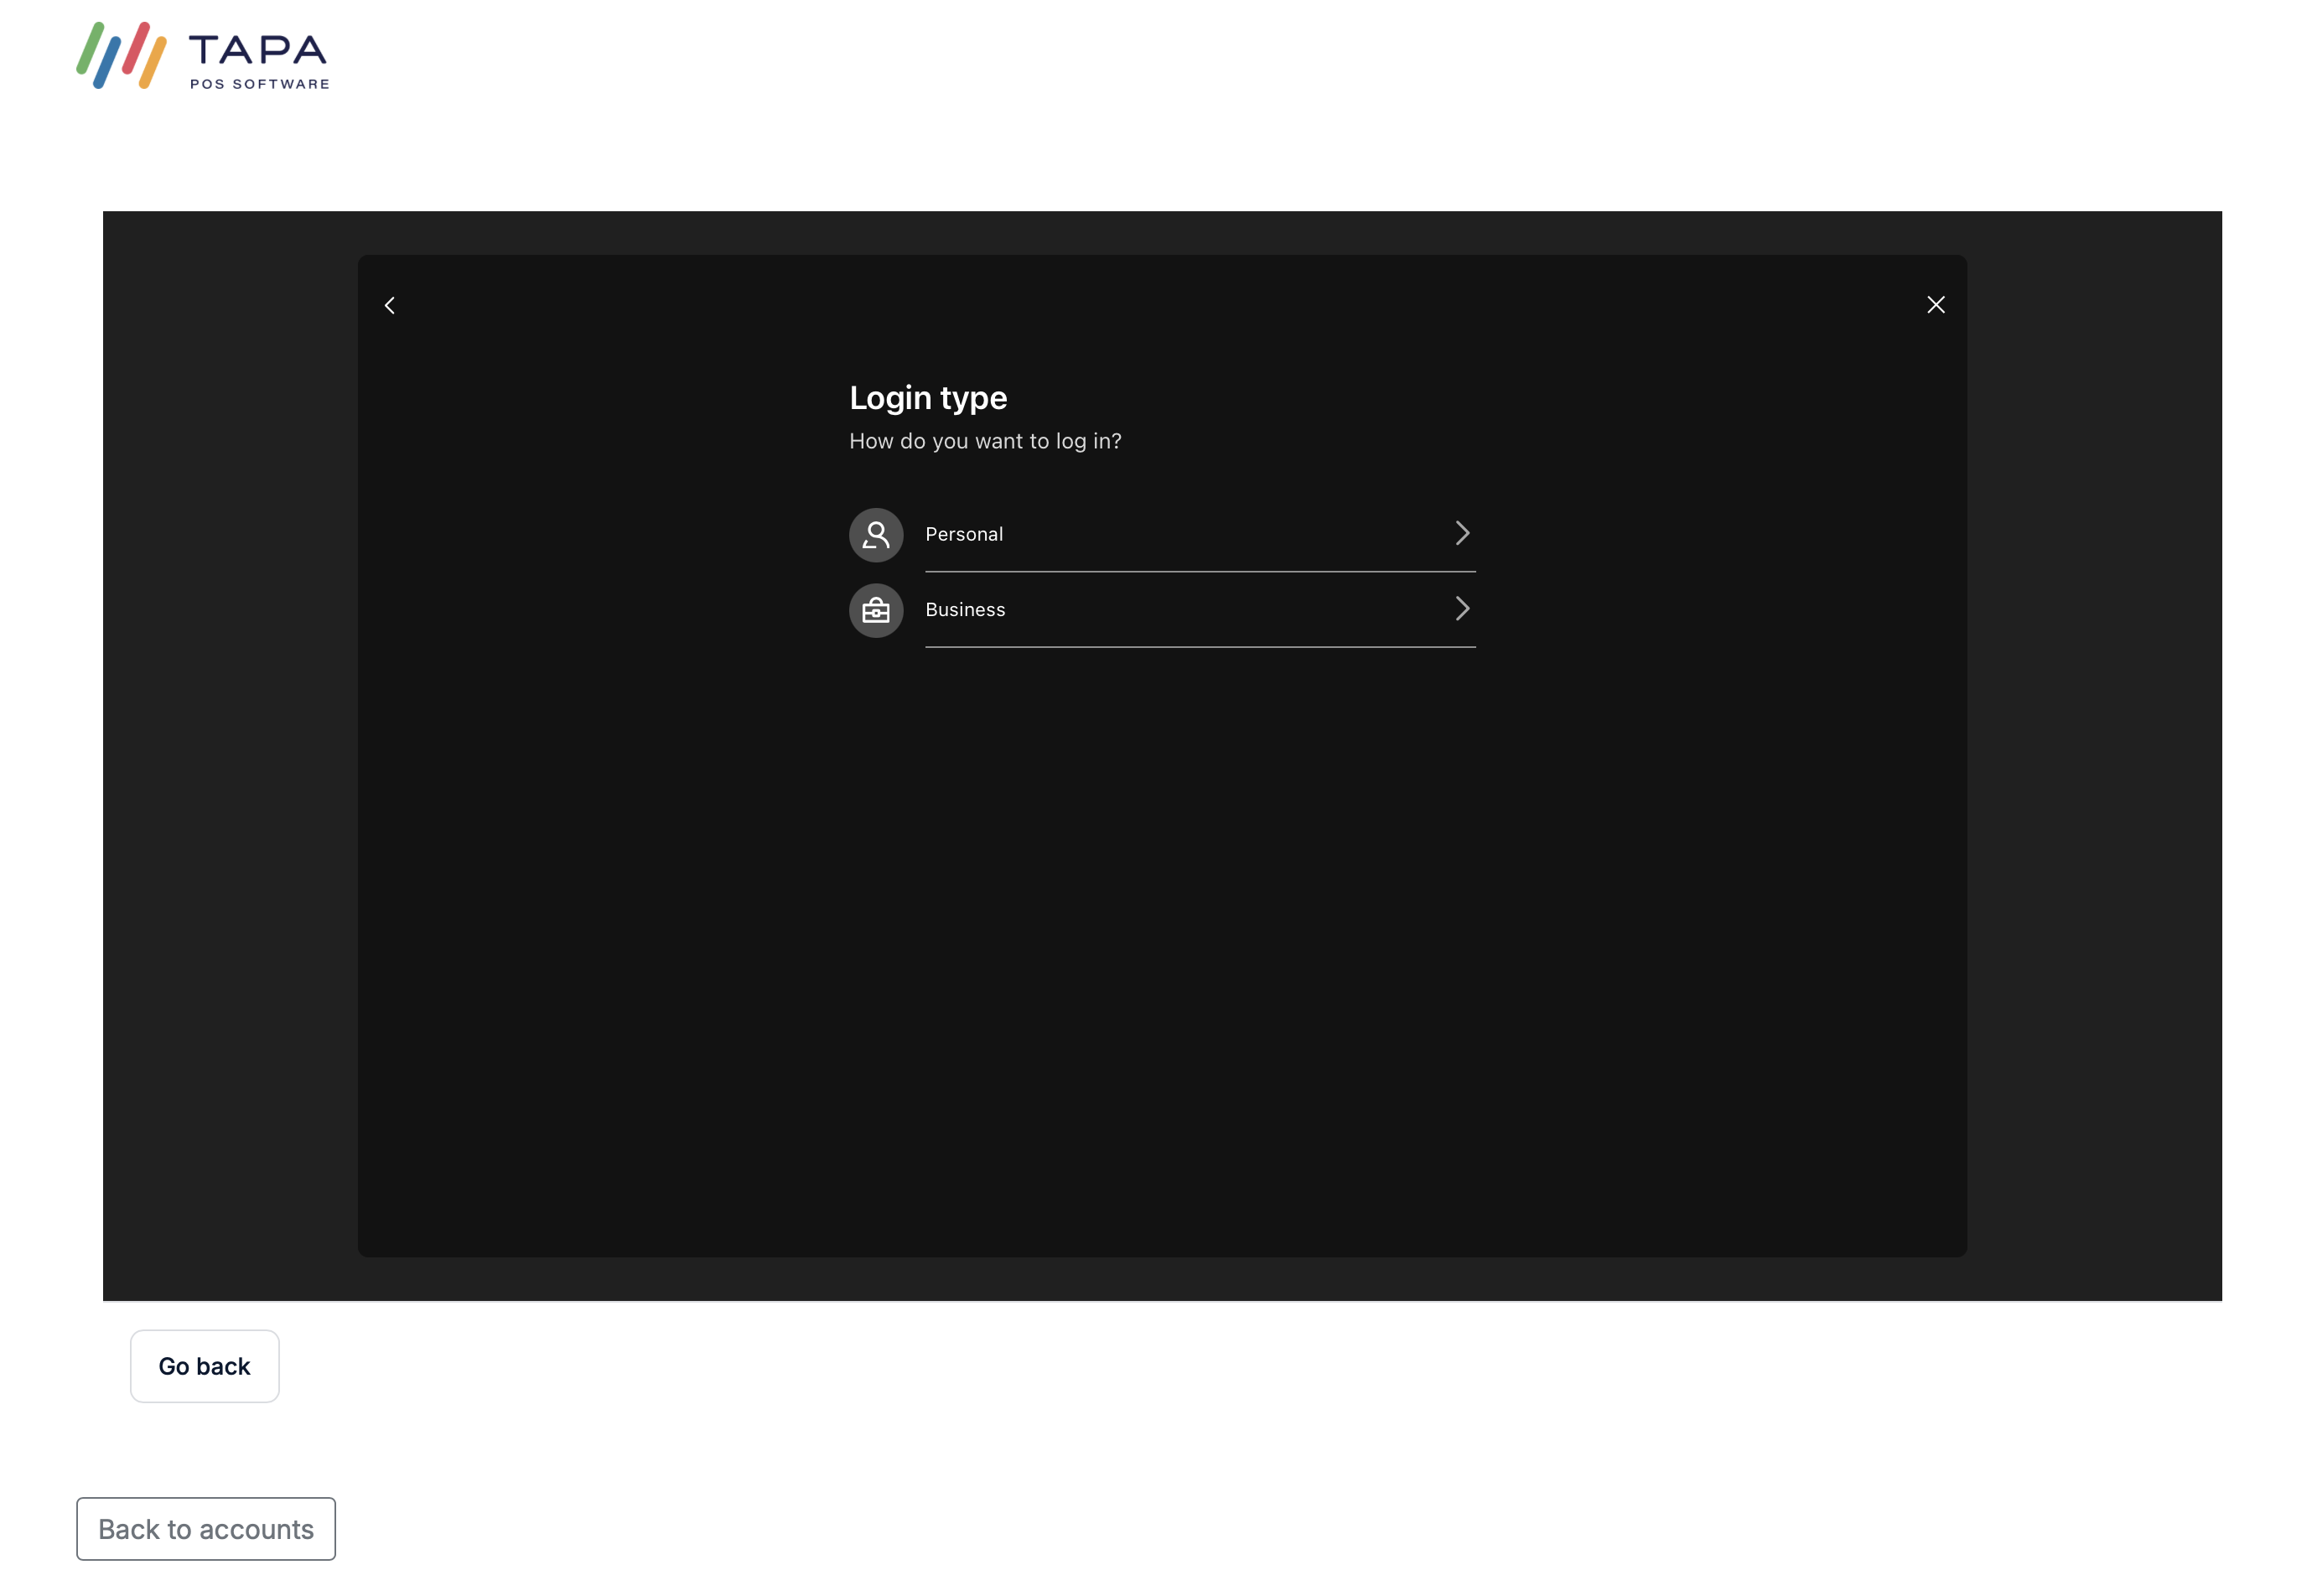
Then choose the account type shown, such as Personal or Business.
On their mobile device scan the QR code to open the mobile banking app so Tink can begin the secure bank connection.
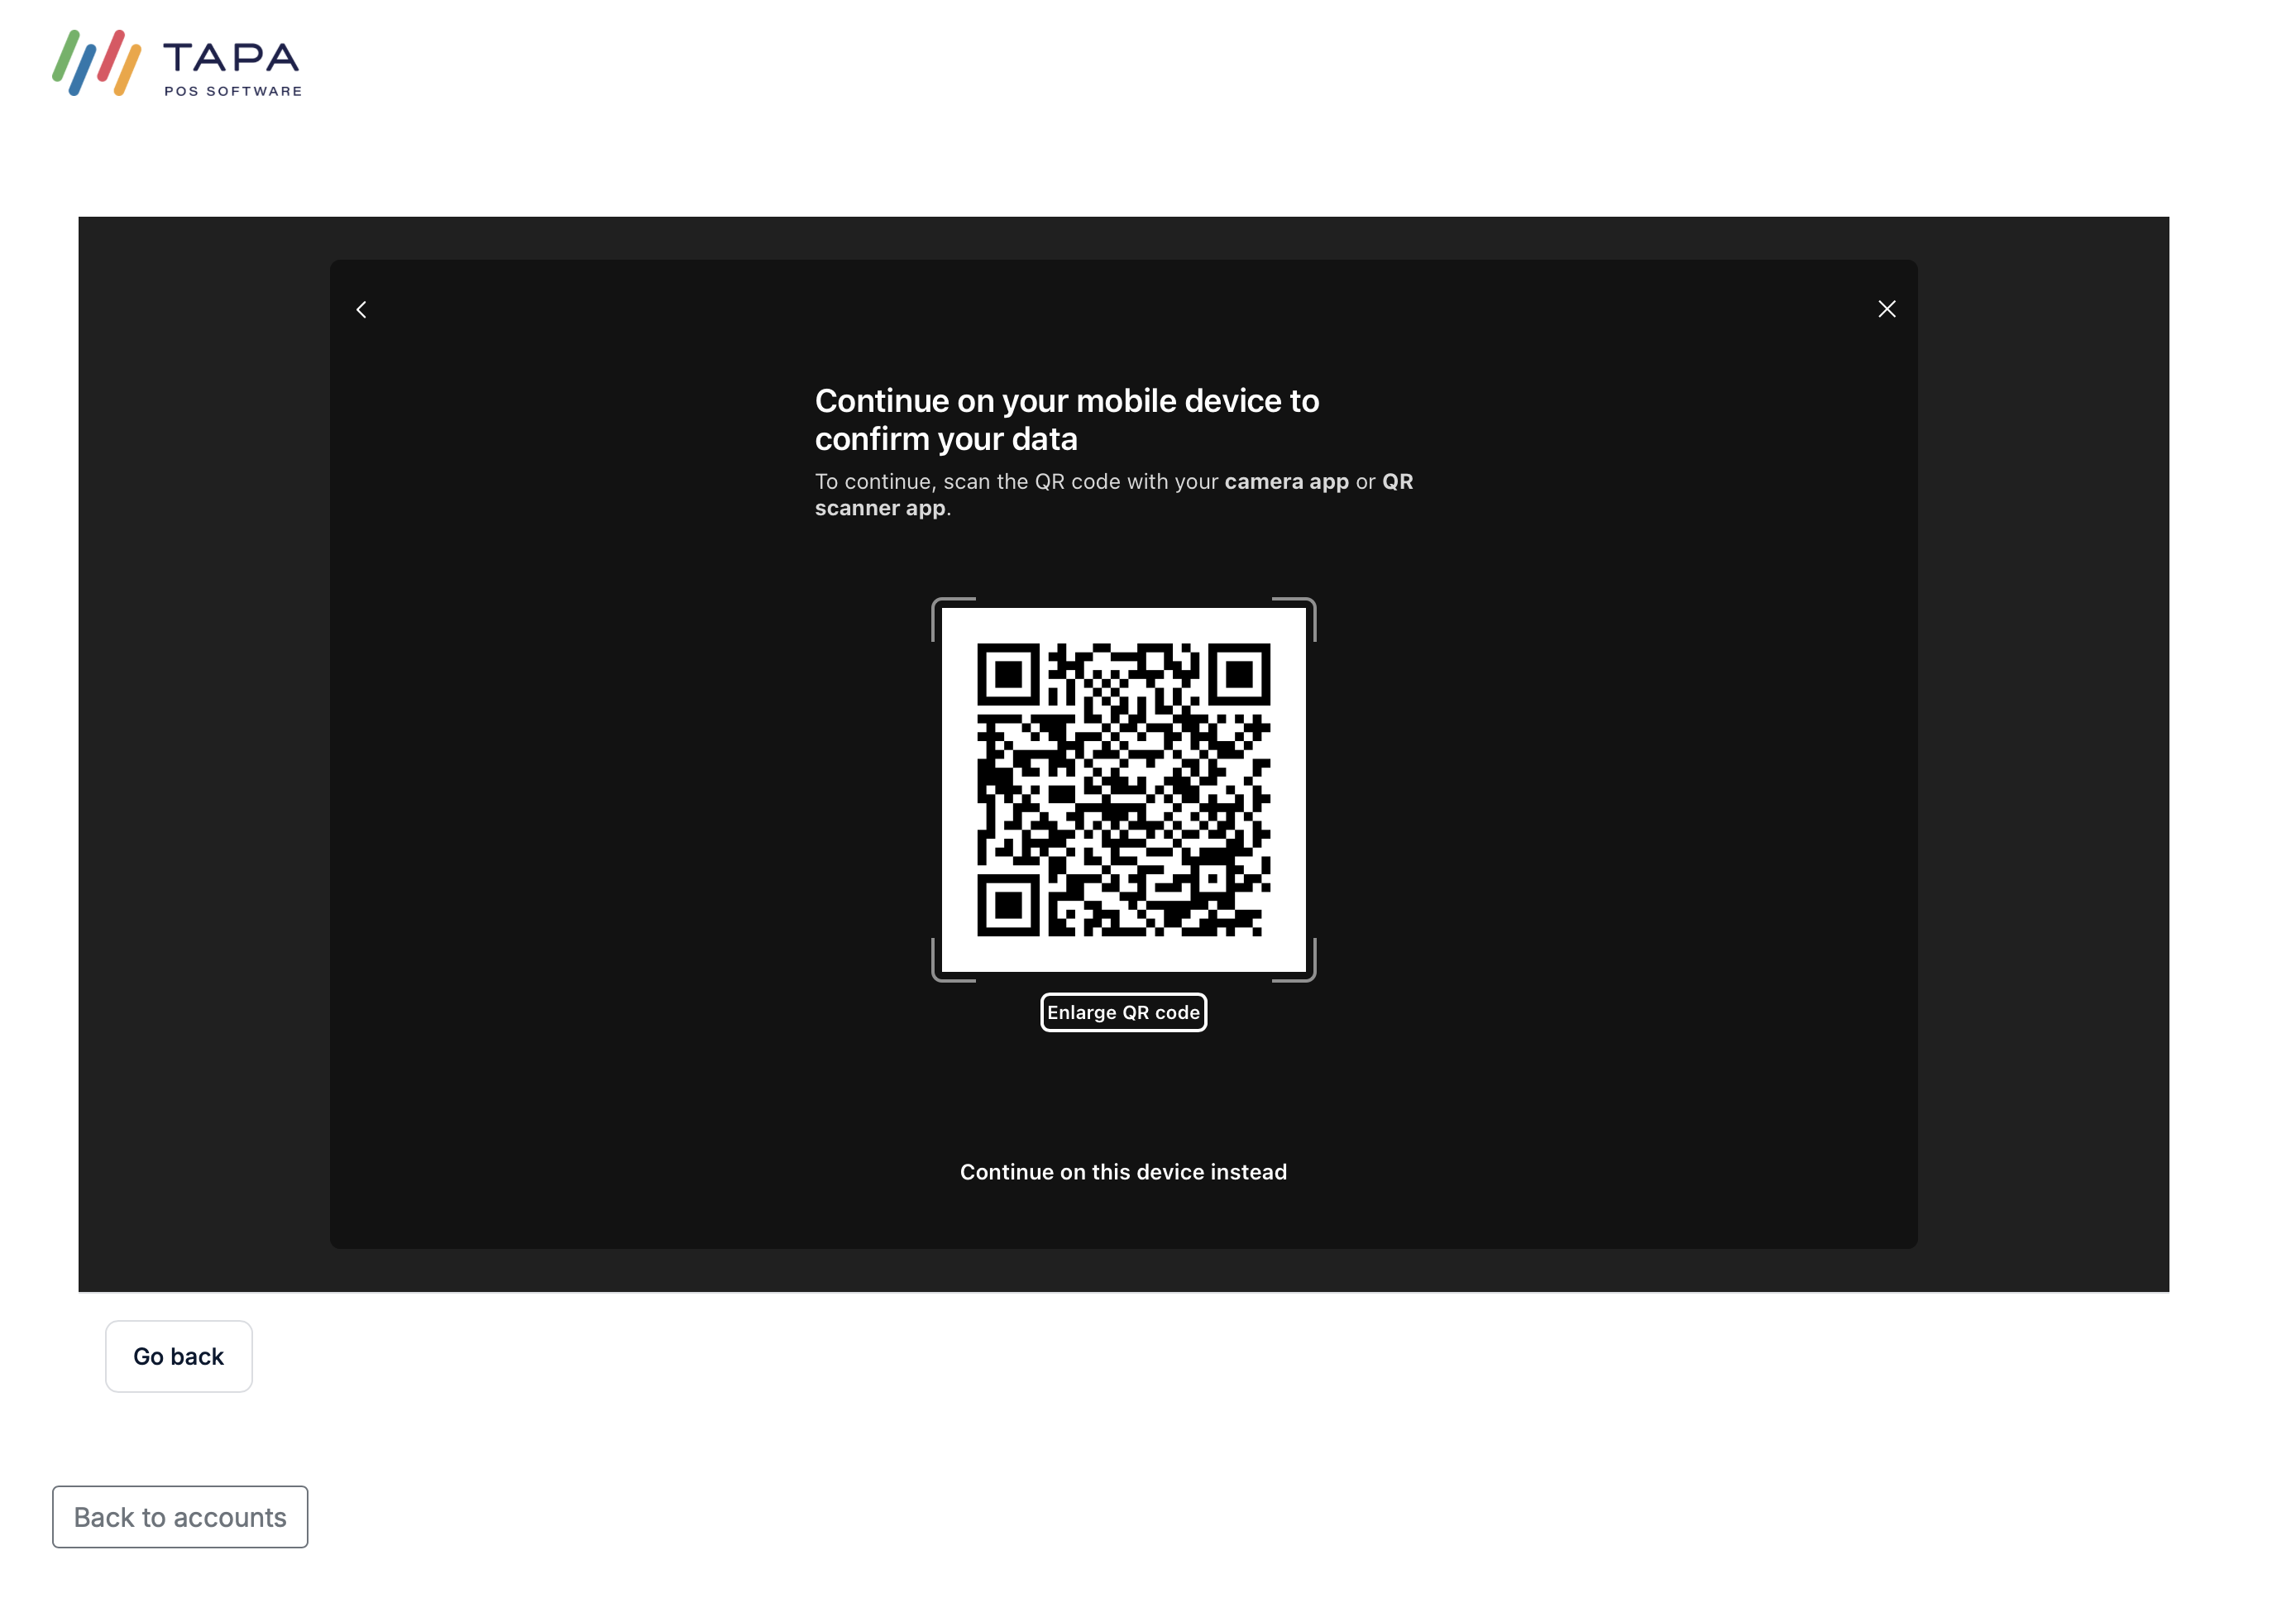
The customer is then shown the bank connection screen and must open their bank login or banking app on their phone to complete verification.
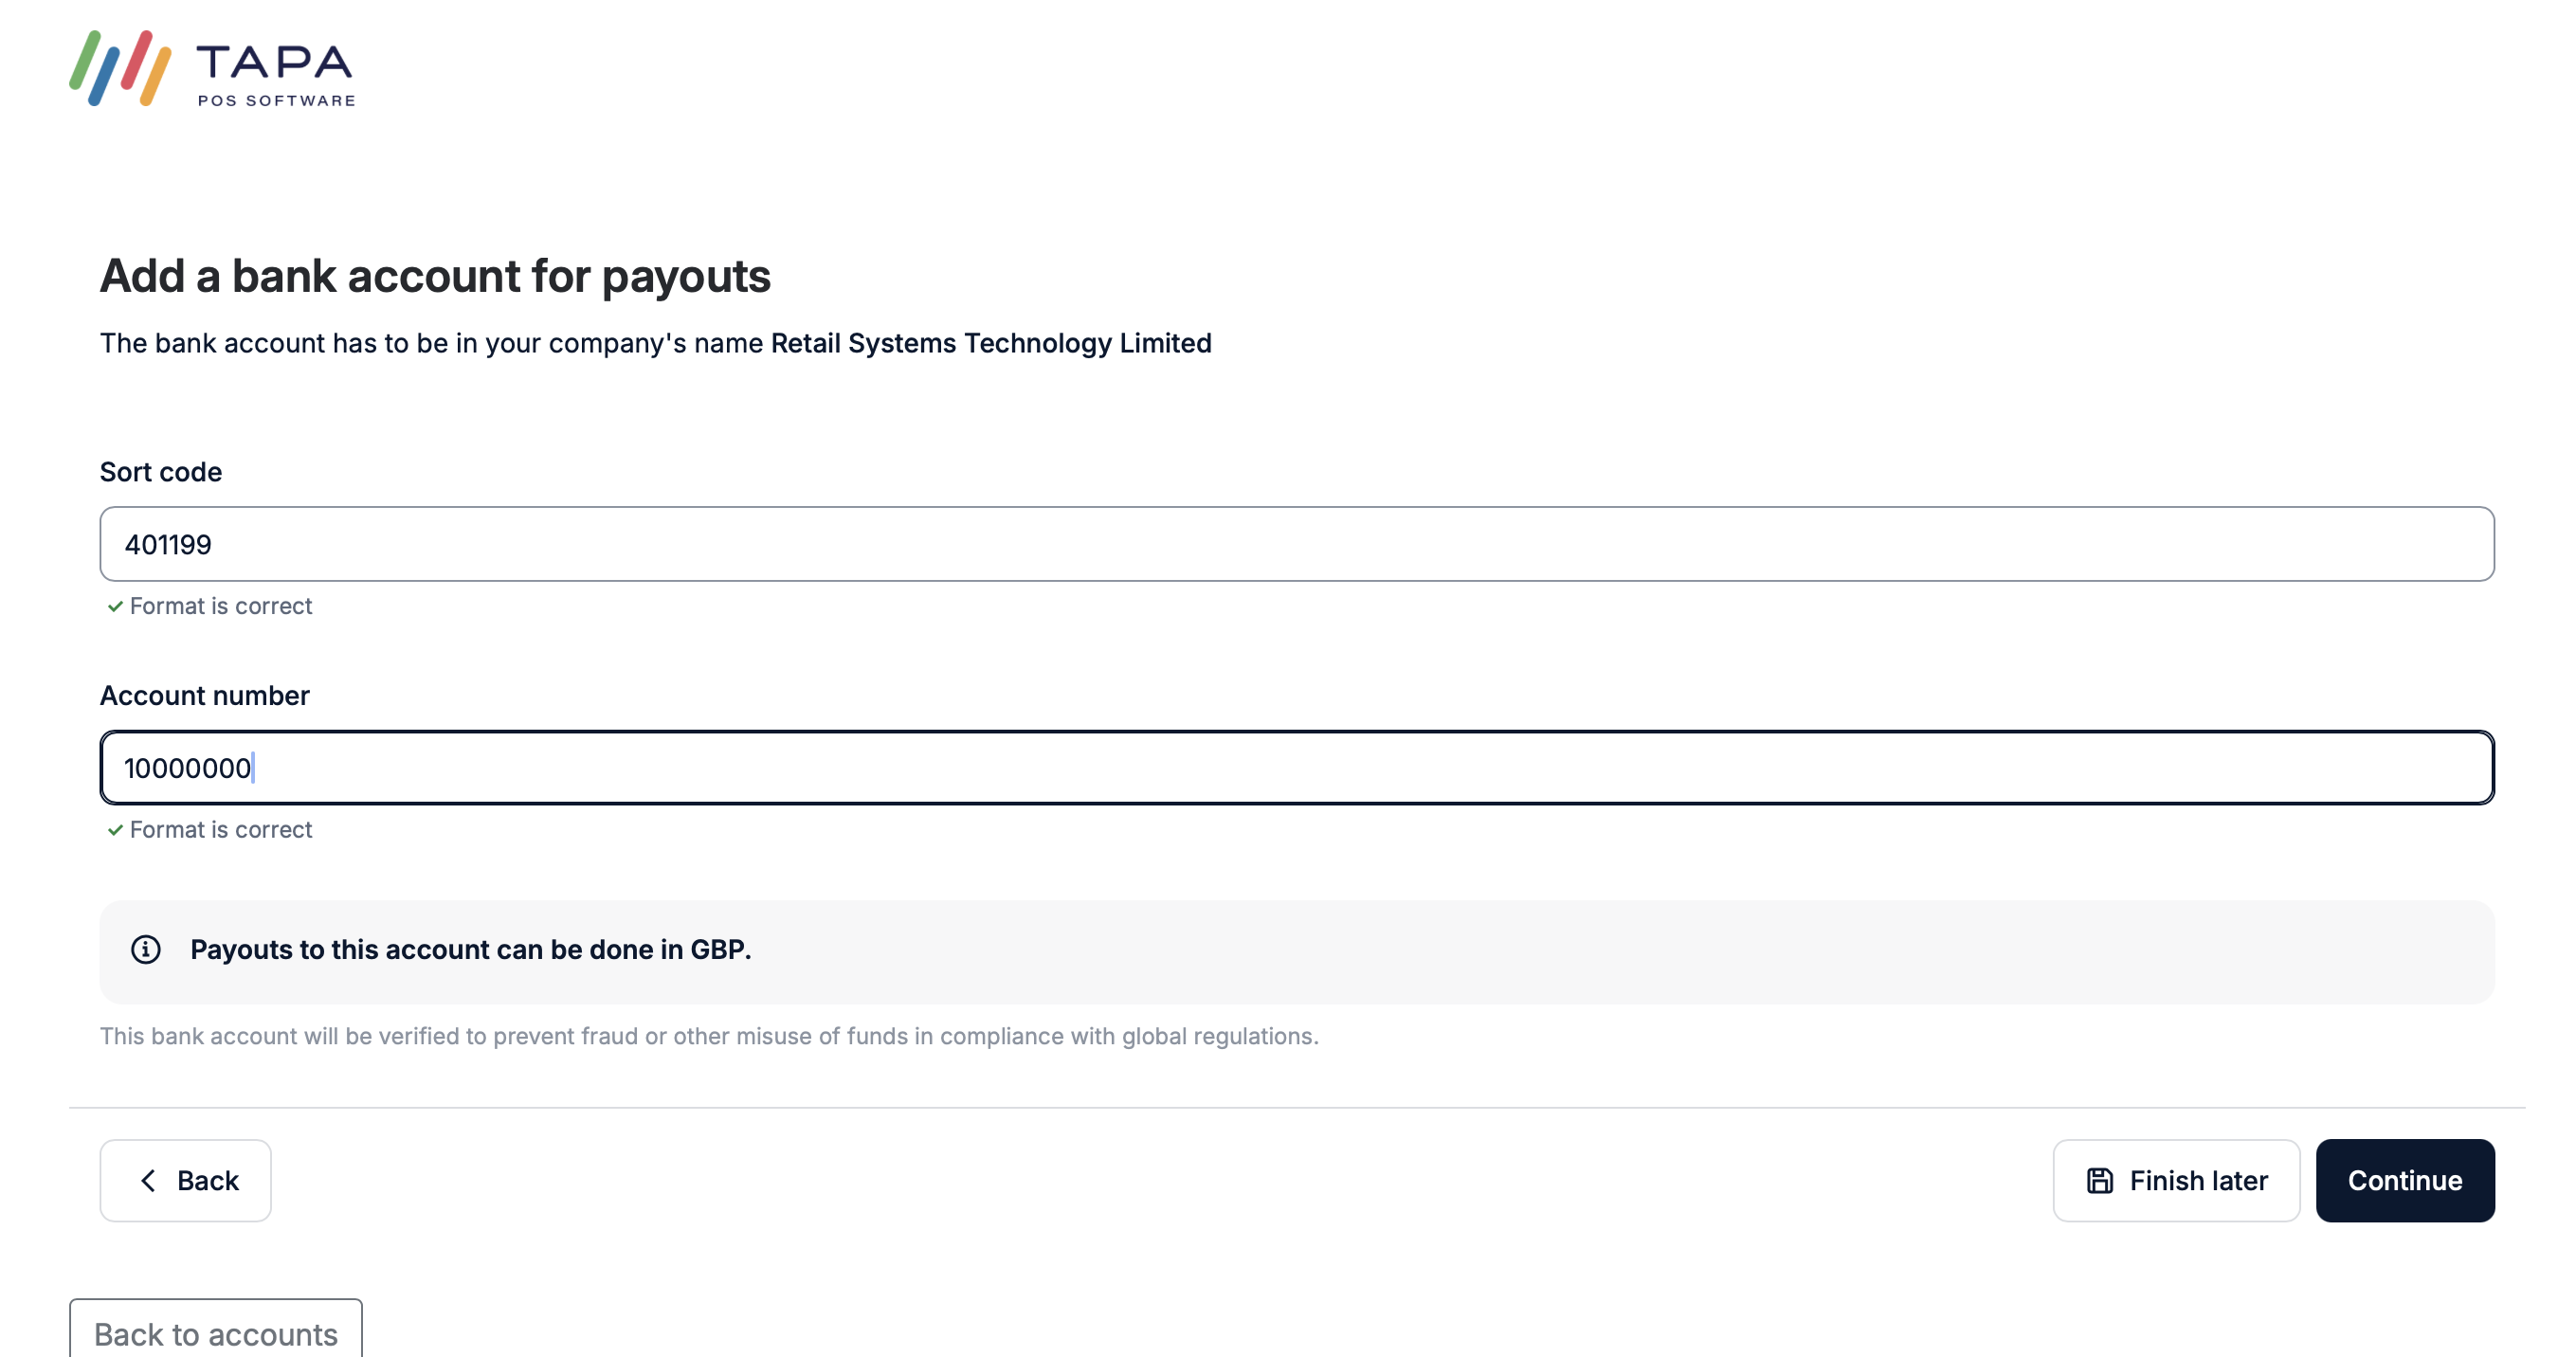
Step 4. Add the bank account manually if needed
If using the document route, enter the payout bank account details such as sort code and account number, then continue.
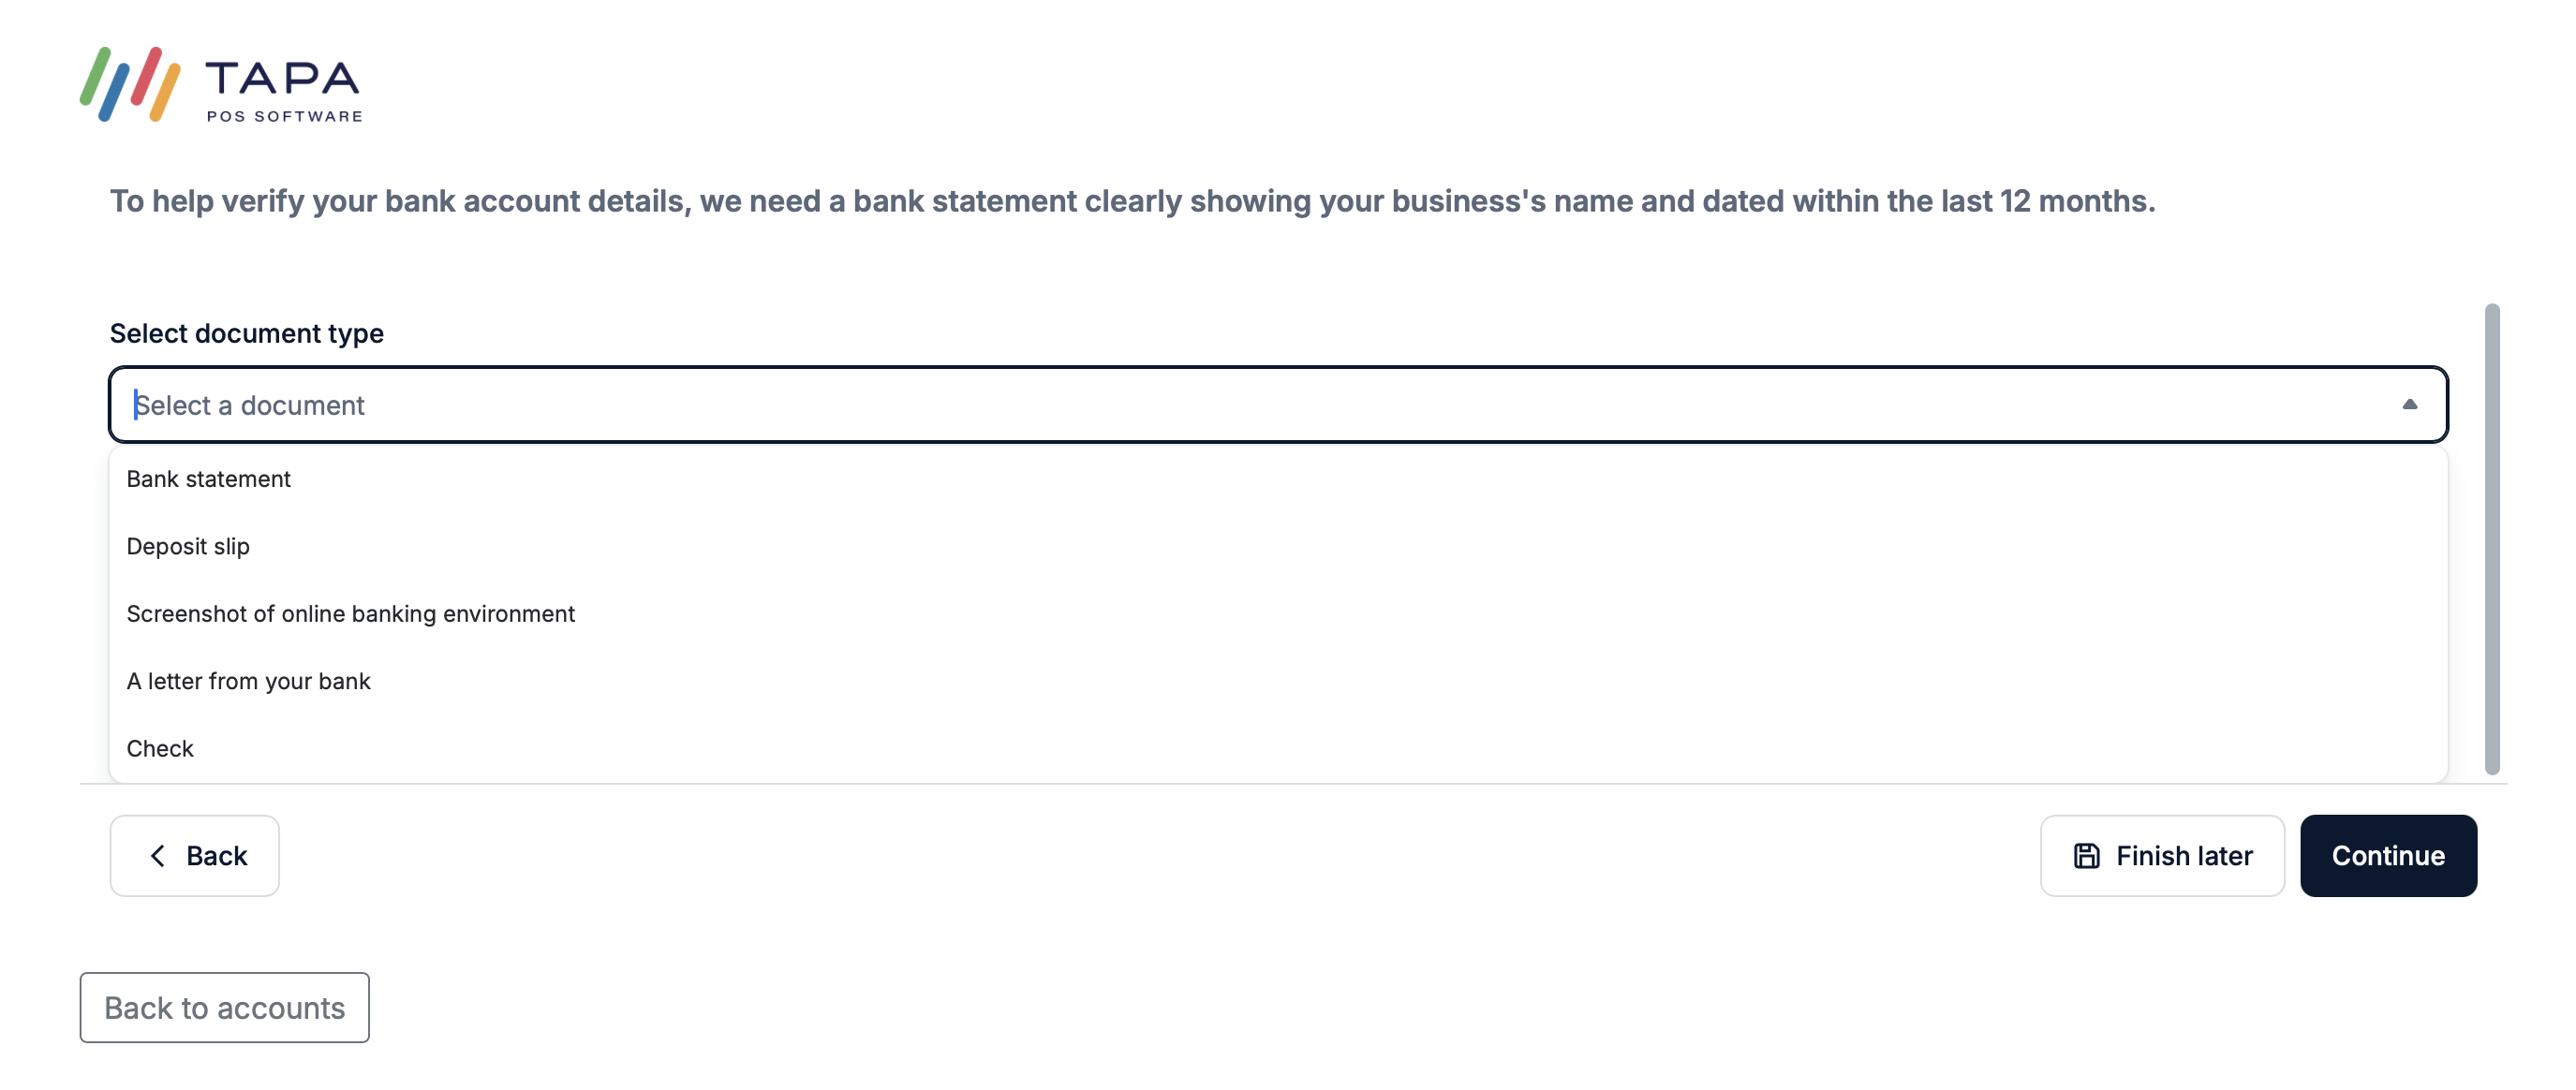
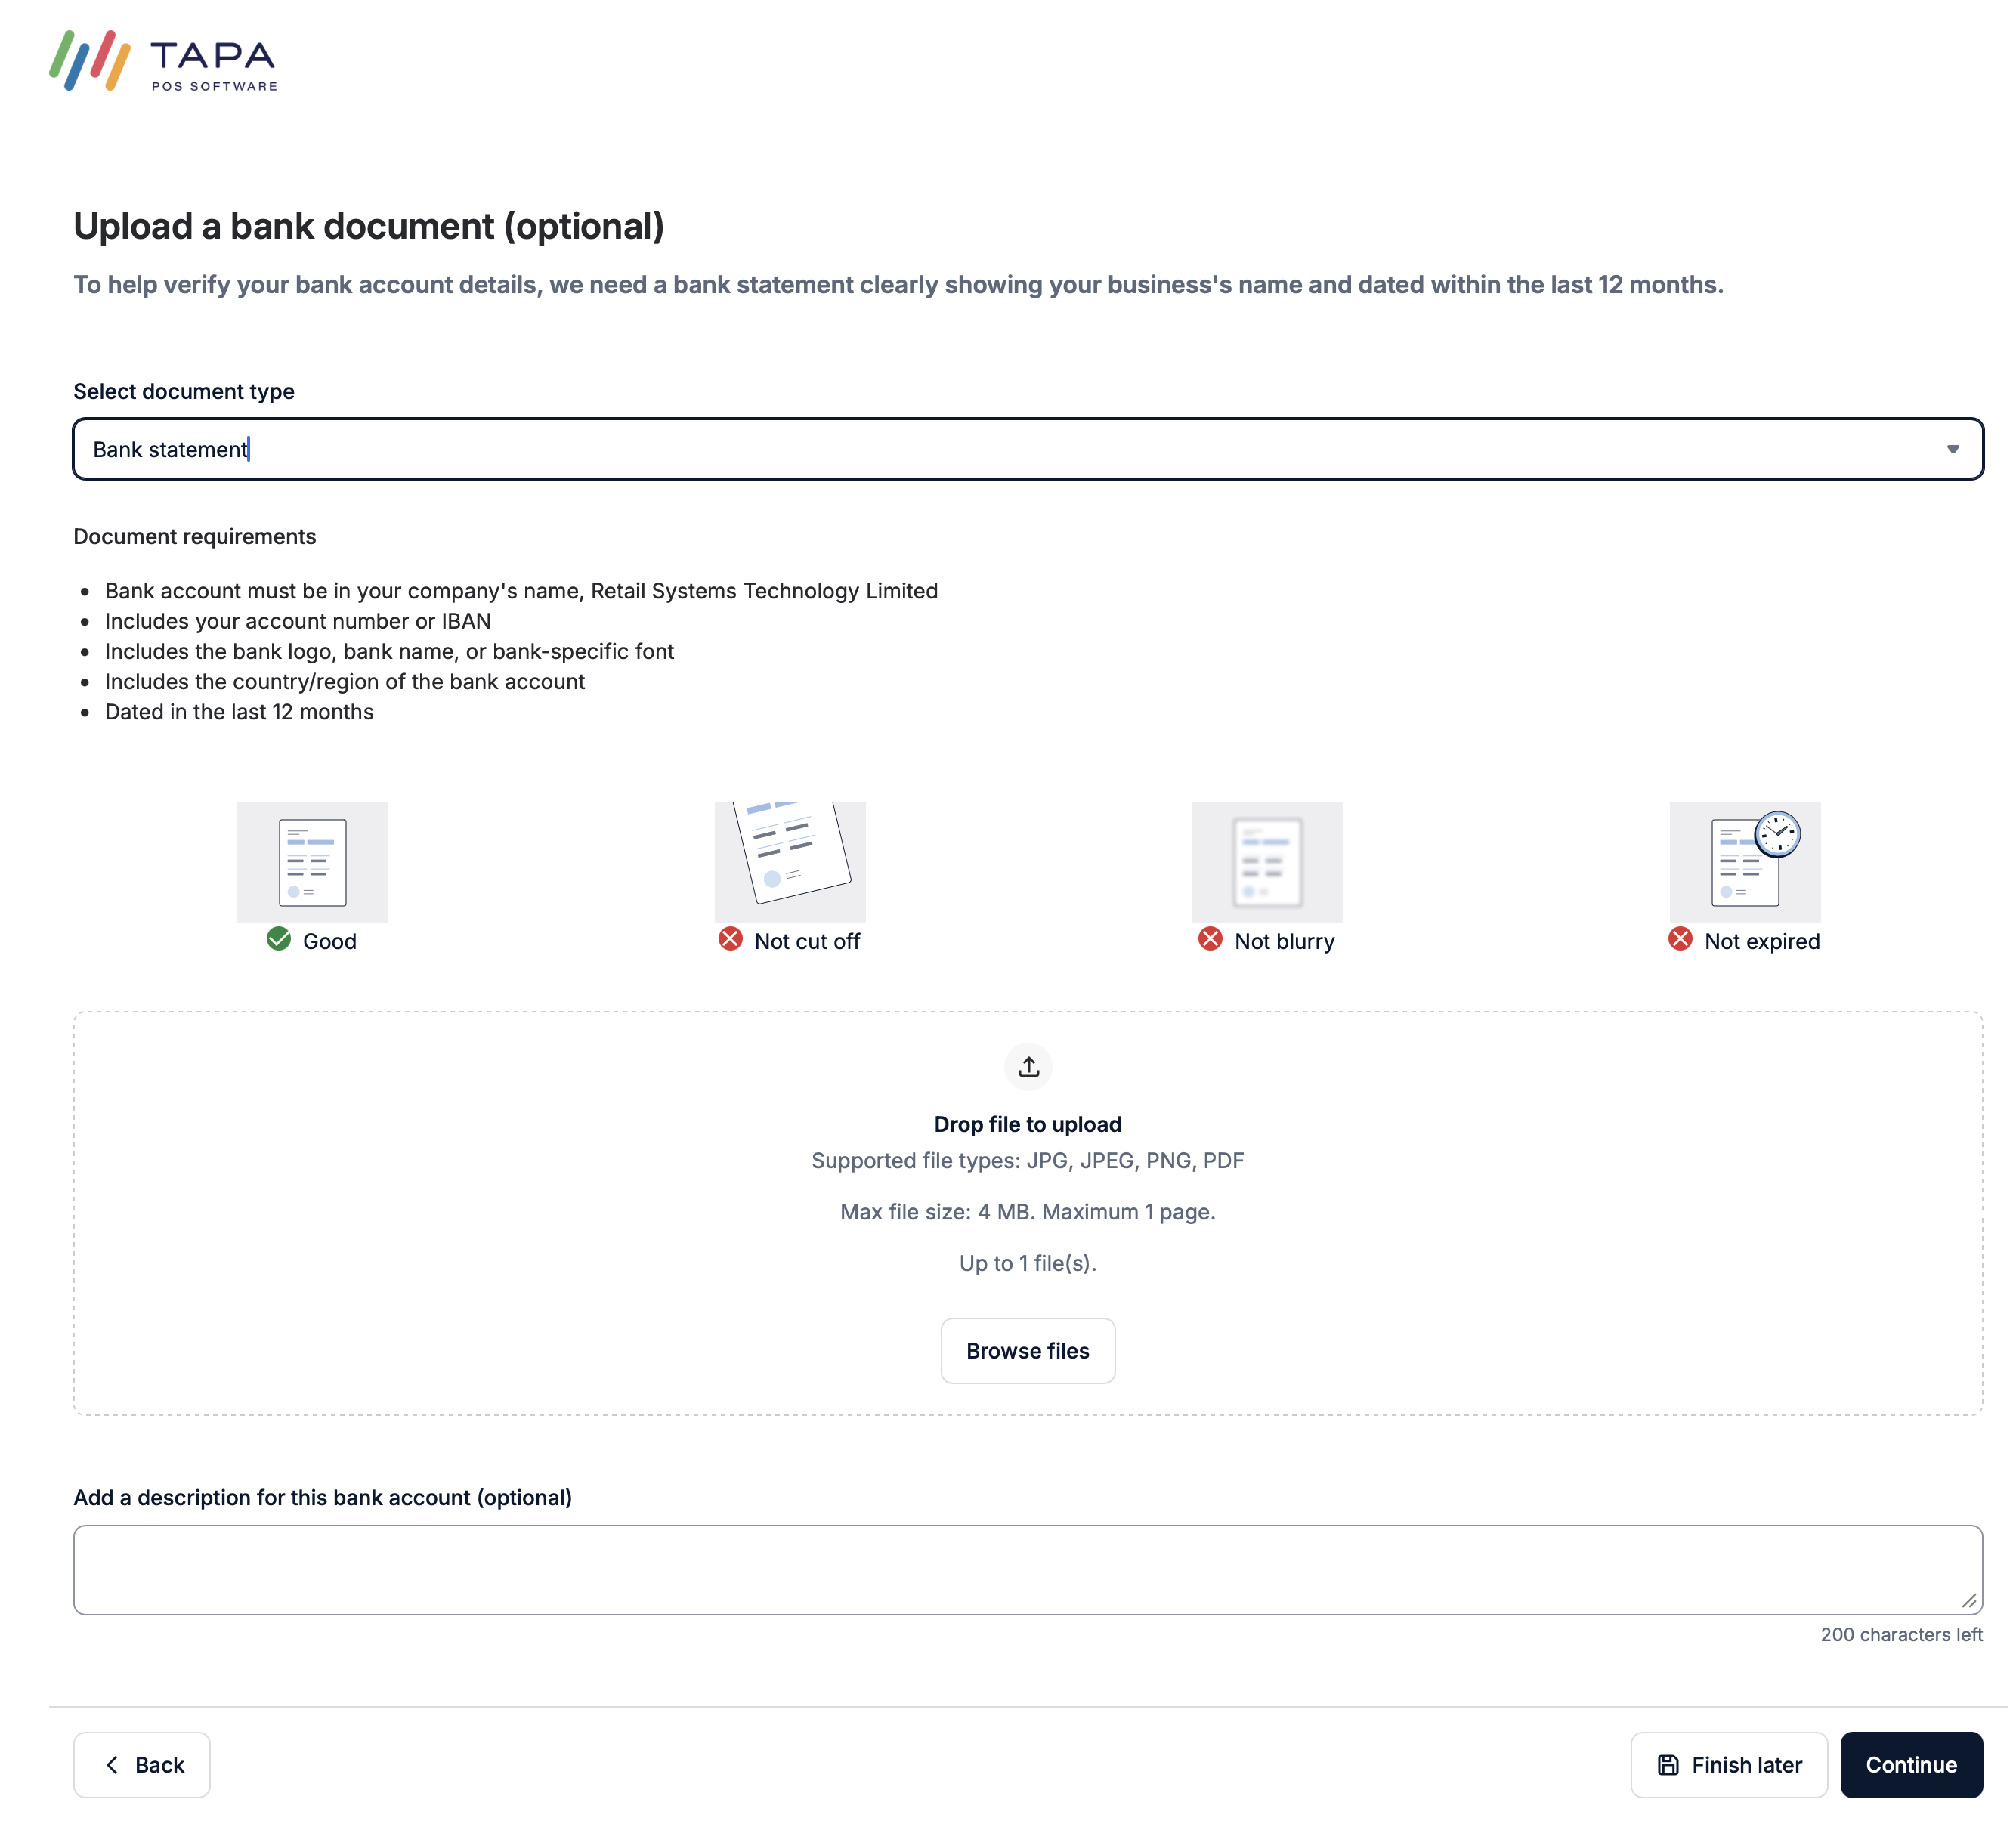
Step 5. Choose the document type
Select the bank document type being uploaded. A bank statement is usually the easiest option.
Step 6. Upload the bank document
Upload a clear document that shows the business name, bank account details, and a recent date. The document must be readable and should usually be dated within the last 12 months.
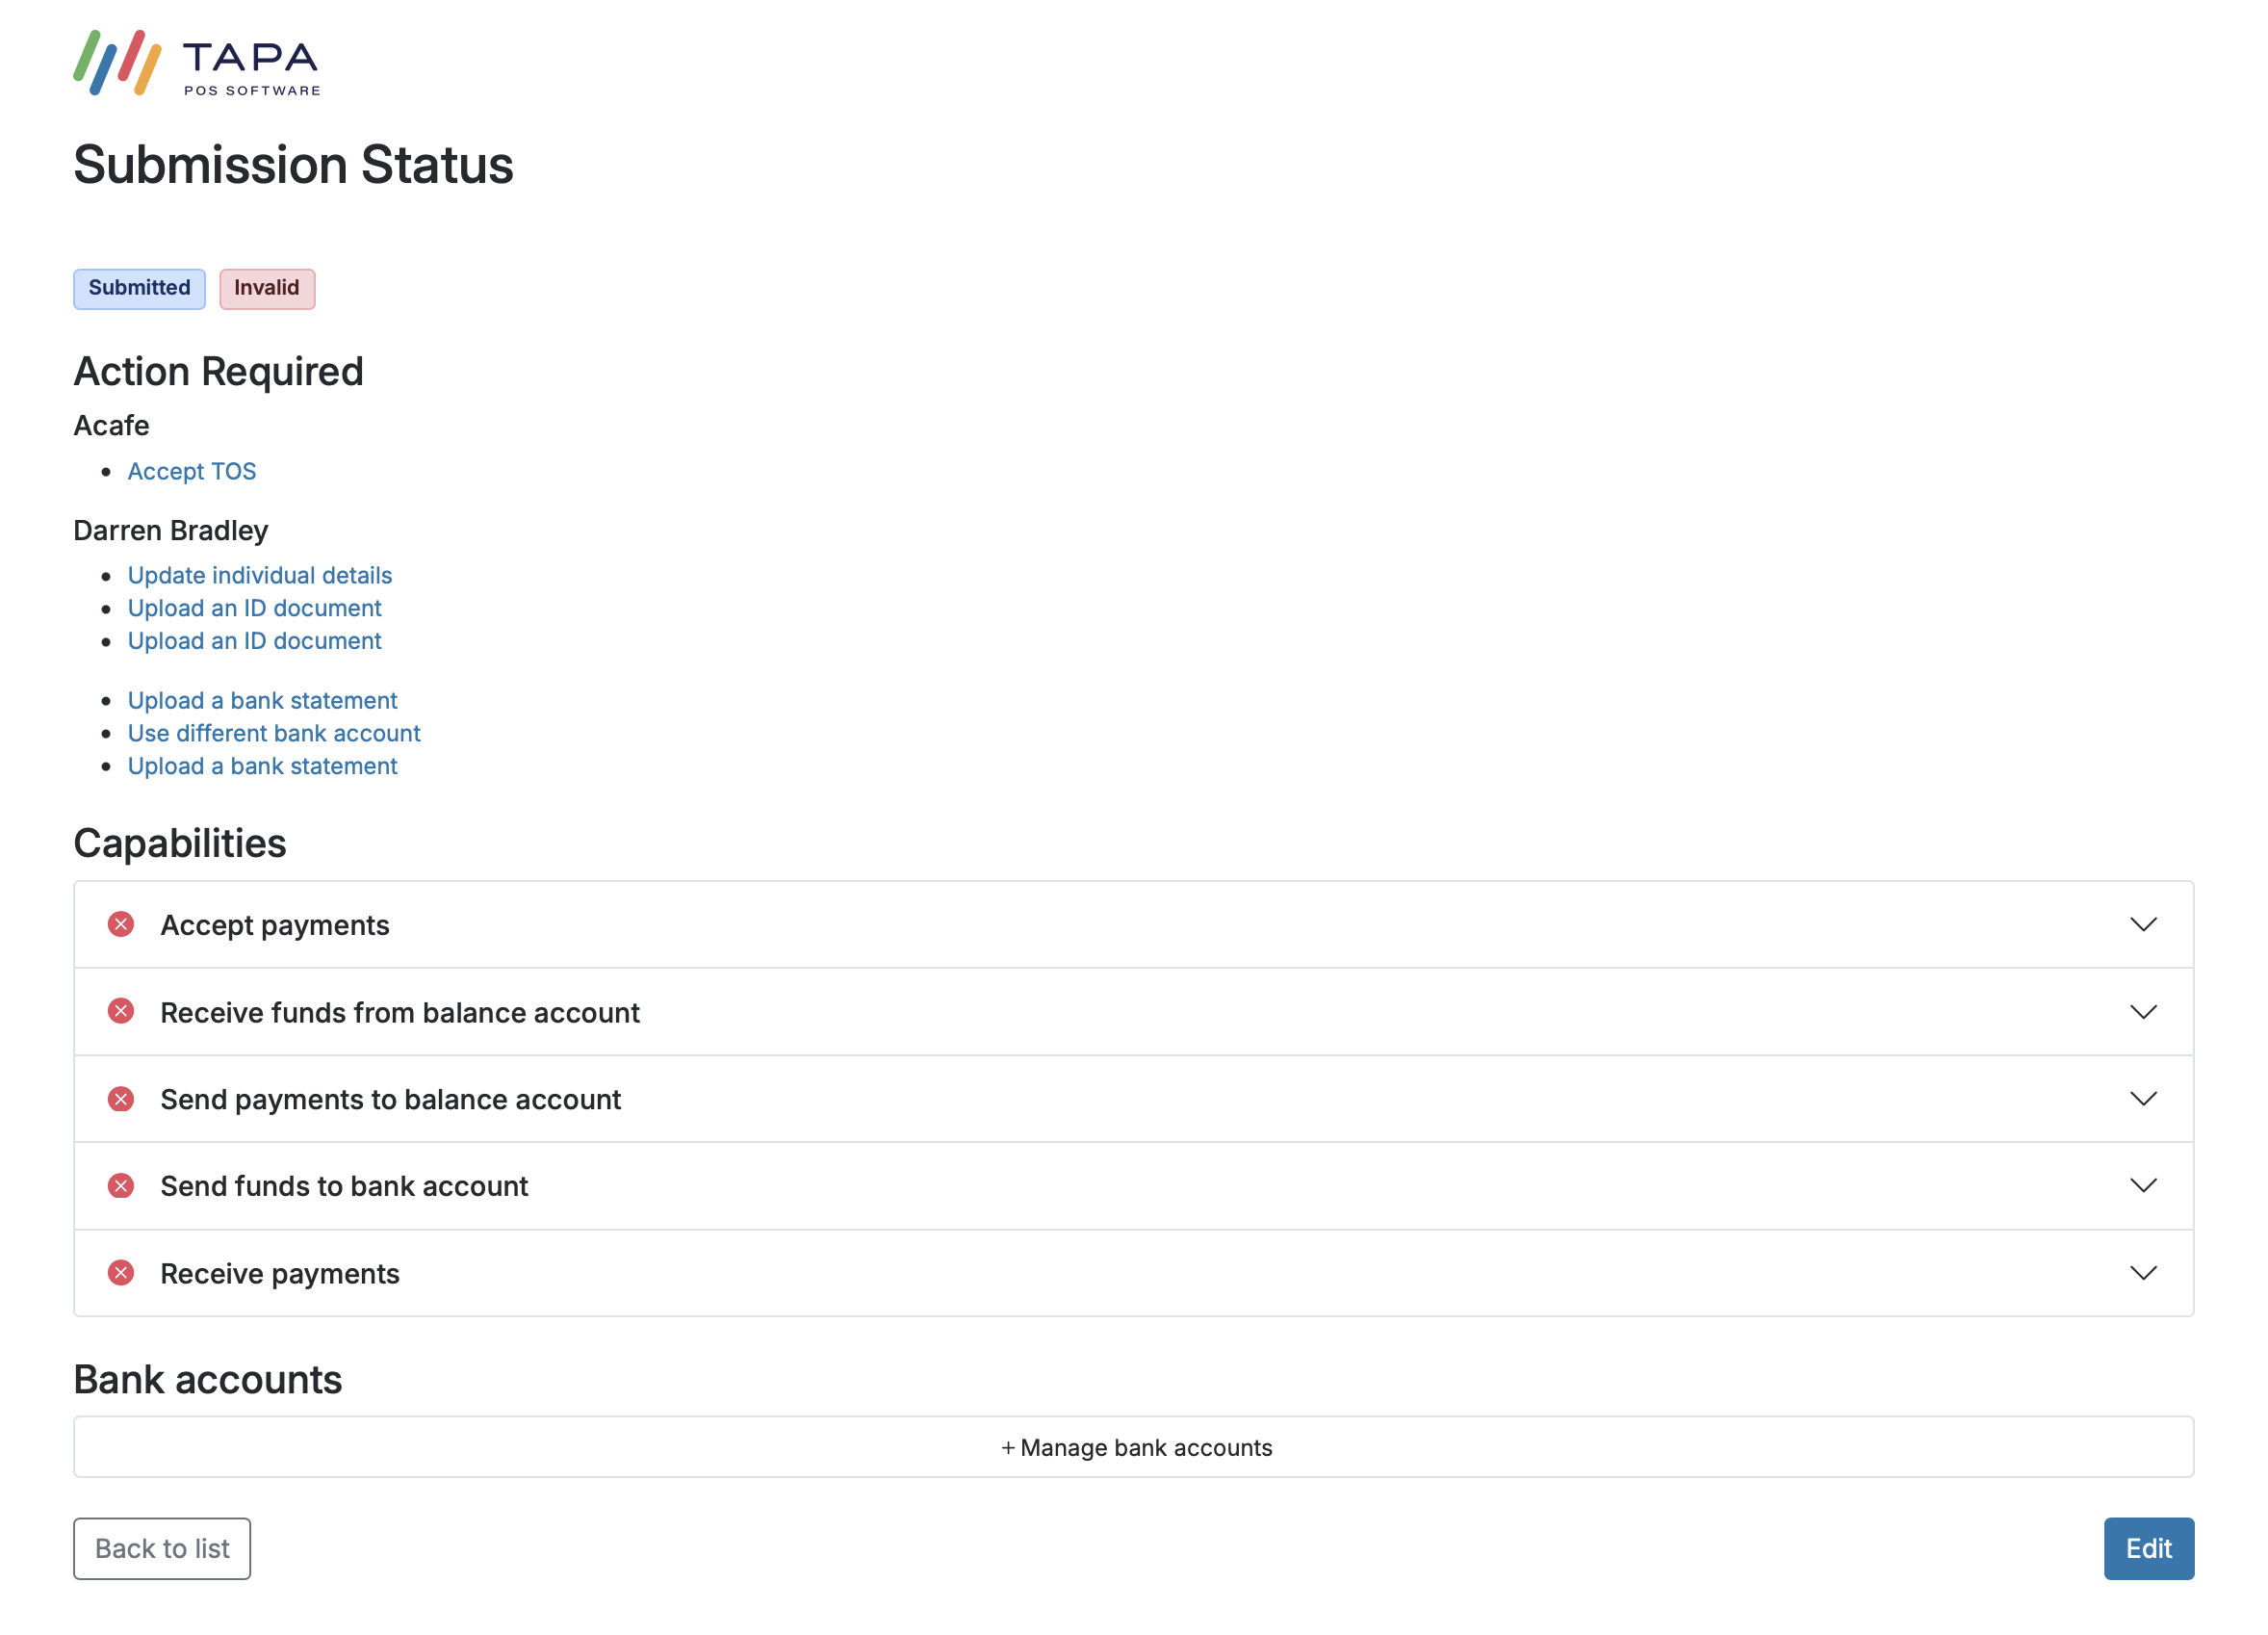
Step 7. Check the Submission Status page
After submission, review the Submission Status page. If anything is still outstanding, use the links under Action Required to complete each item.
This can include accepting terms and conditions, uploading a bank statement, using a different bank account, updating personal details, or uploading an ID document.
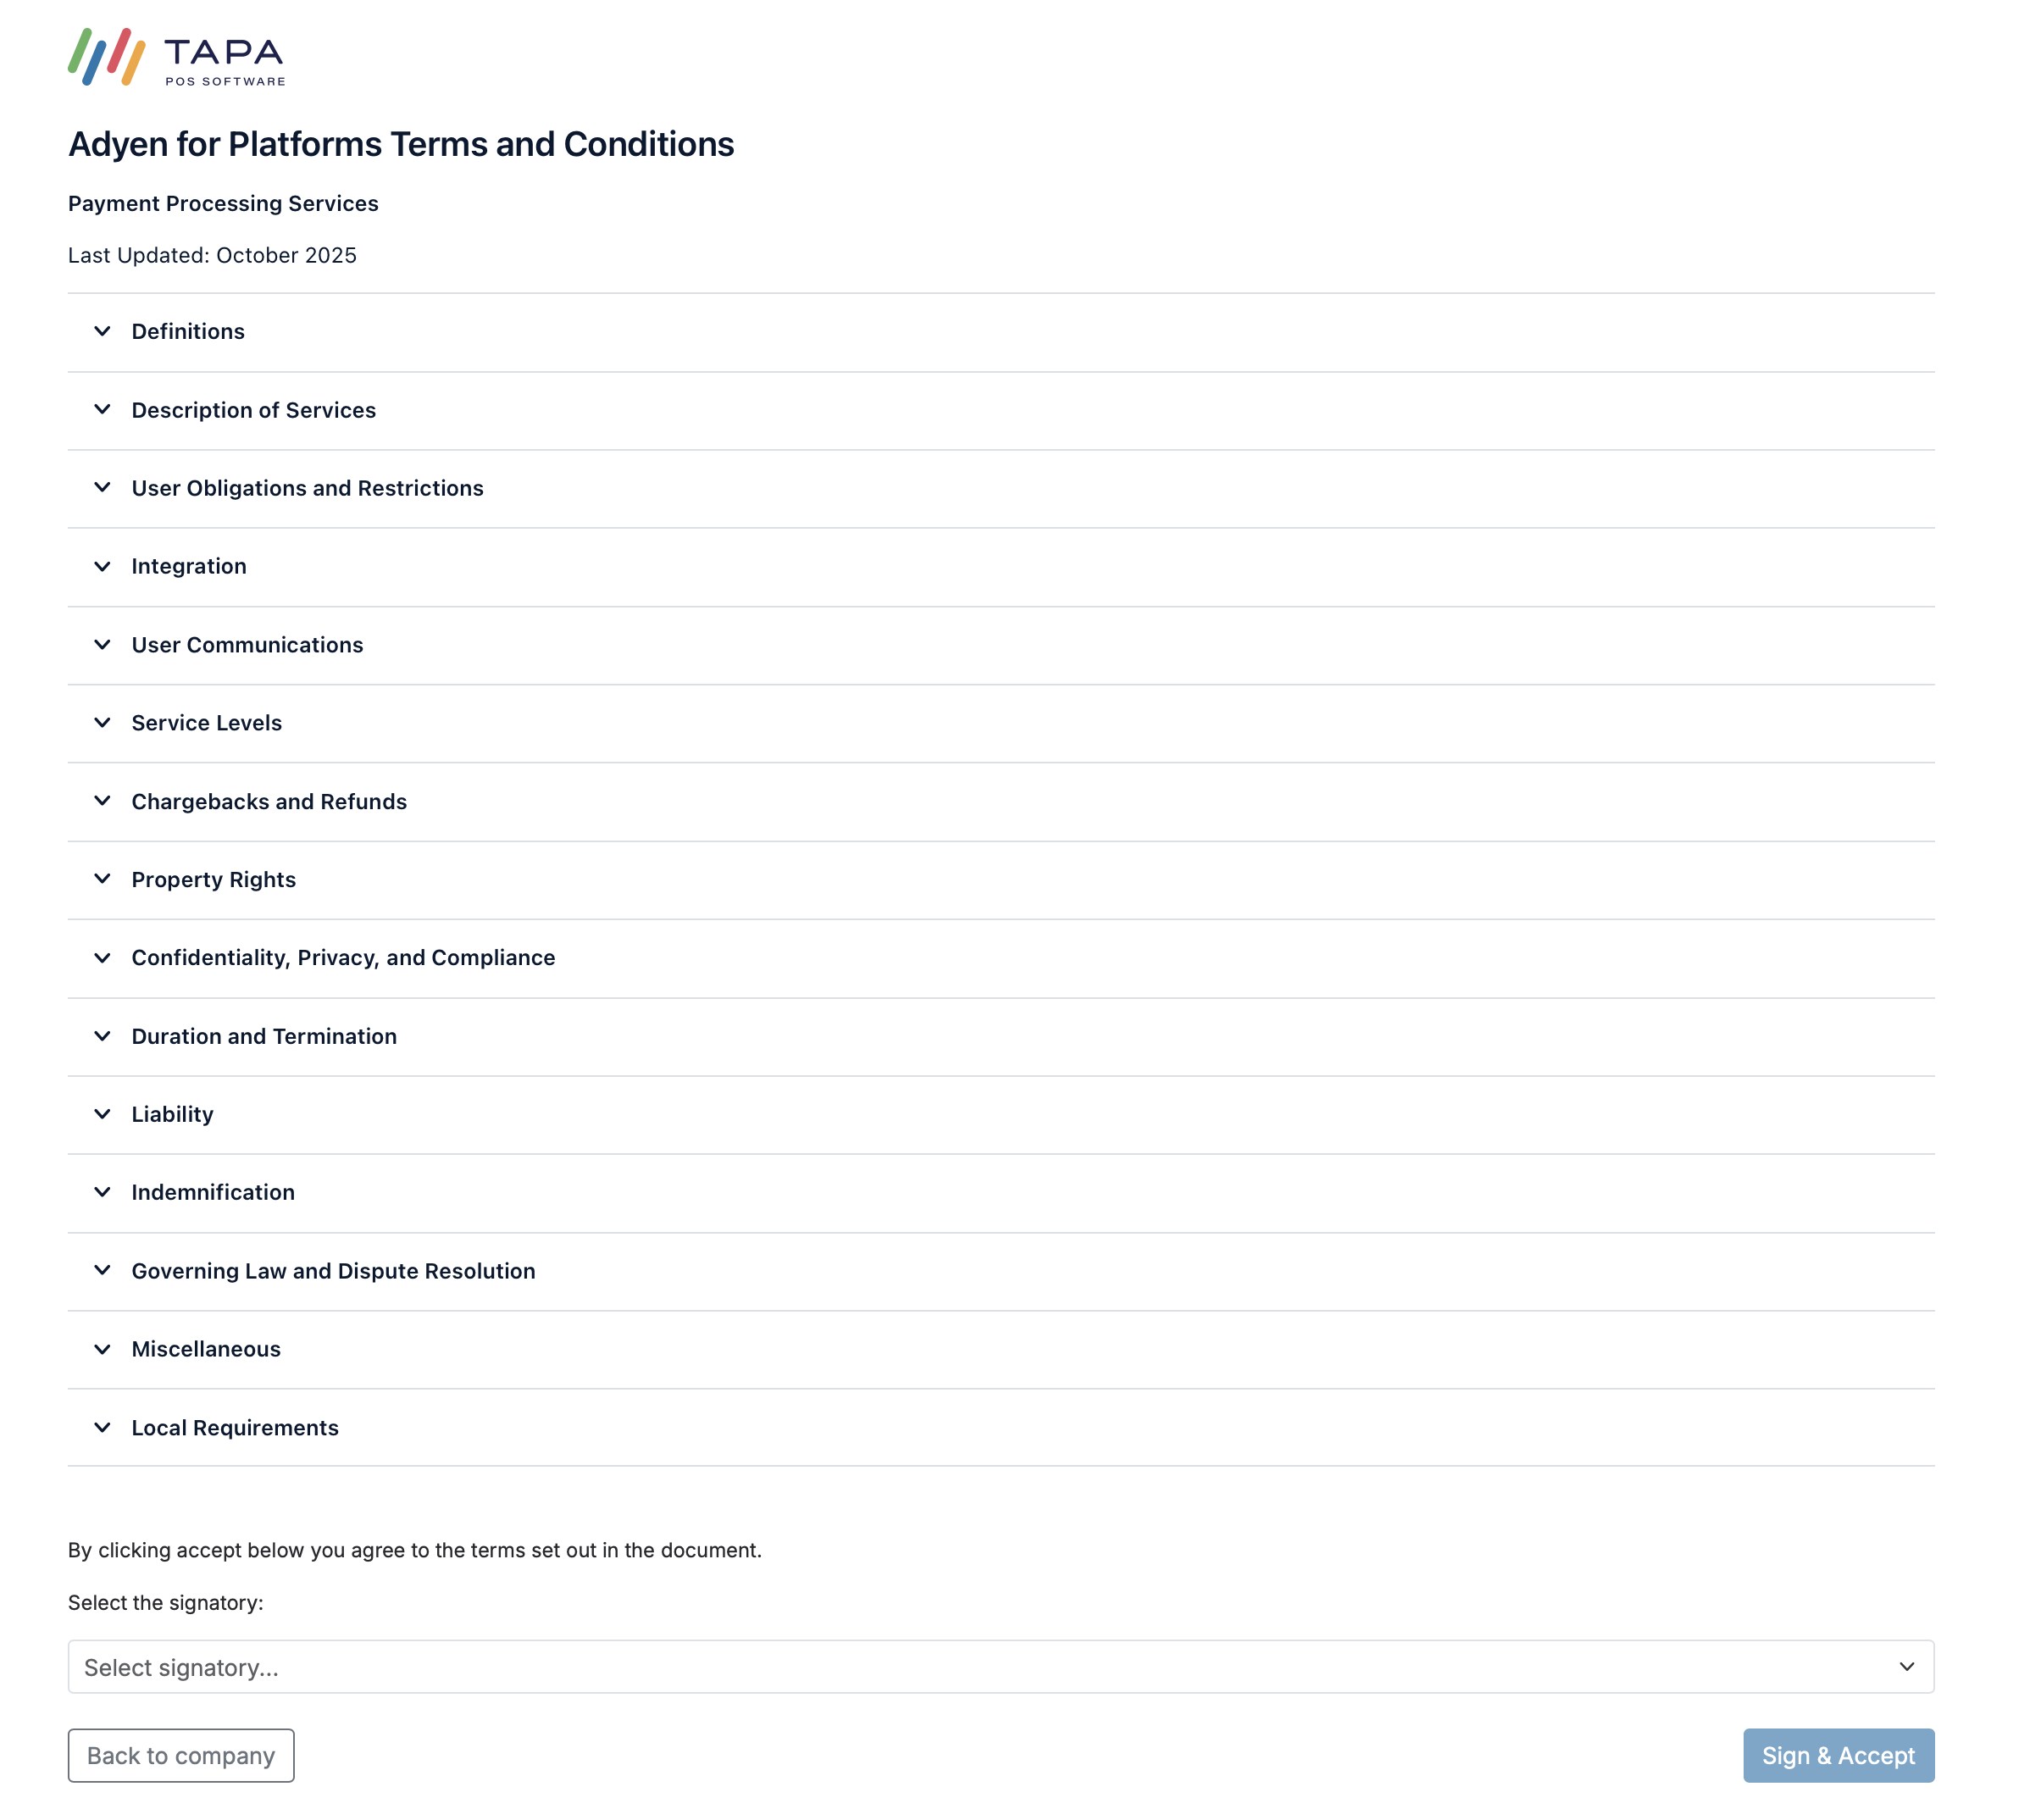
Step 8. Accept the terms and conditions if requested
If Accept TOS appears, open the terms page, choose the correct signatory, then click Sign & Accept.
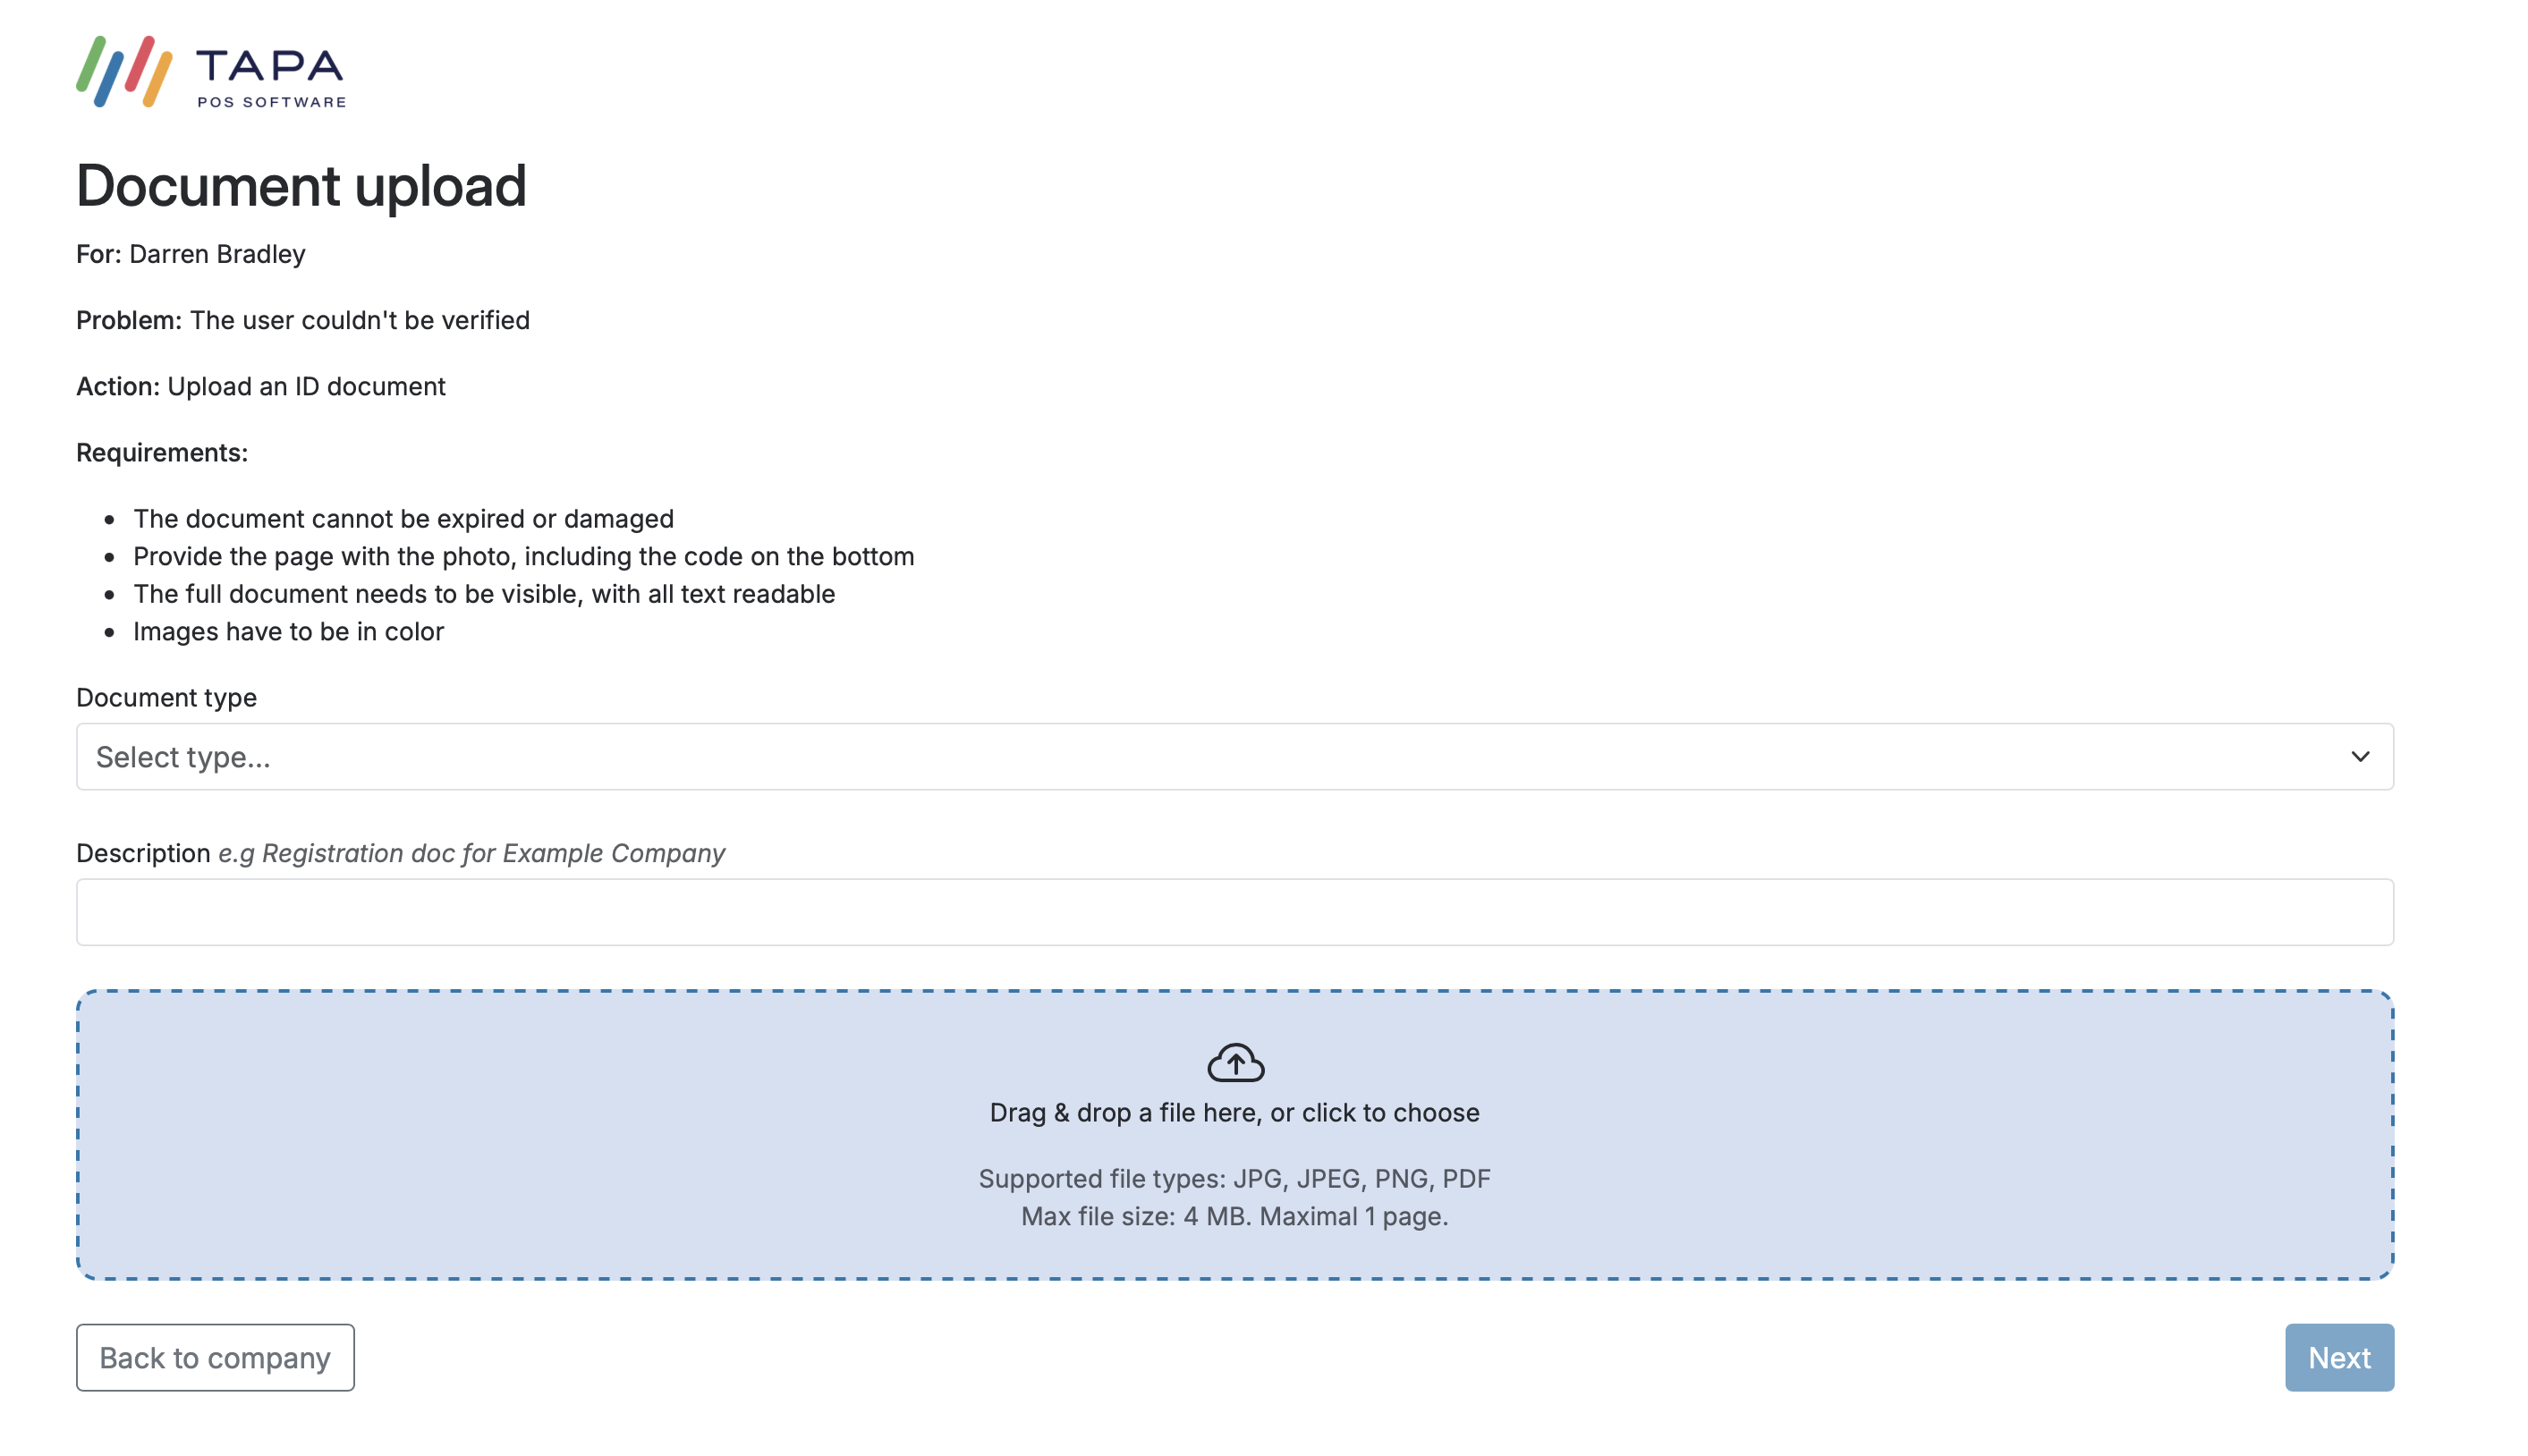
Step 9. Upload ID if requested
If the application asks for ID, upload the requested document and make sure the image is clear, in colour, not expired, and shows the full page including the photo and code area.
This step may not be required if the customer has already been fully verified through the banking app verification flow.
What the customer should have ready
- Business bank account details for payouts
- A phone with access to the banking app if using instant verification
- A recent bank statement or another accepted bank document if the app route is not used
- A valid ID document in case additional identity verification is requested
Troubleshooting
If instant bank verification does not complete, switch to the bank document route and upload a recent statement or another accepted document that clearly shows the business name and account details.
If the Submission Status page shows Action Required, open each link and complete it before checking the application again.
If ID upload appears after the bank account is added, this means extra verification is still required. Complete the upload and then review the status page again.
FAQ
When is the bank account added?
The payout bank account is added after the main onboarding application has been submitted.
Does the customer always need to upload ID after adding the bank account?
No. ID upload may only appear if extra verification is required. If the bank account is successfully verified through the app flow, there may be no ID step at all.
What is the easiest bank verification option?
The instant banking app route is usually the quickest option if the customer can access their bank app on their phone.